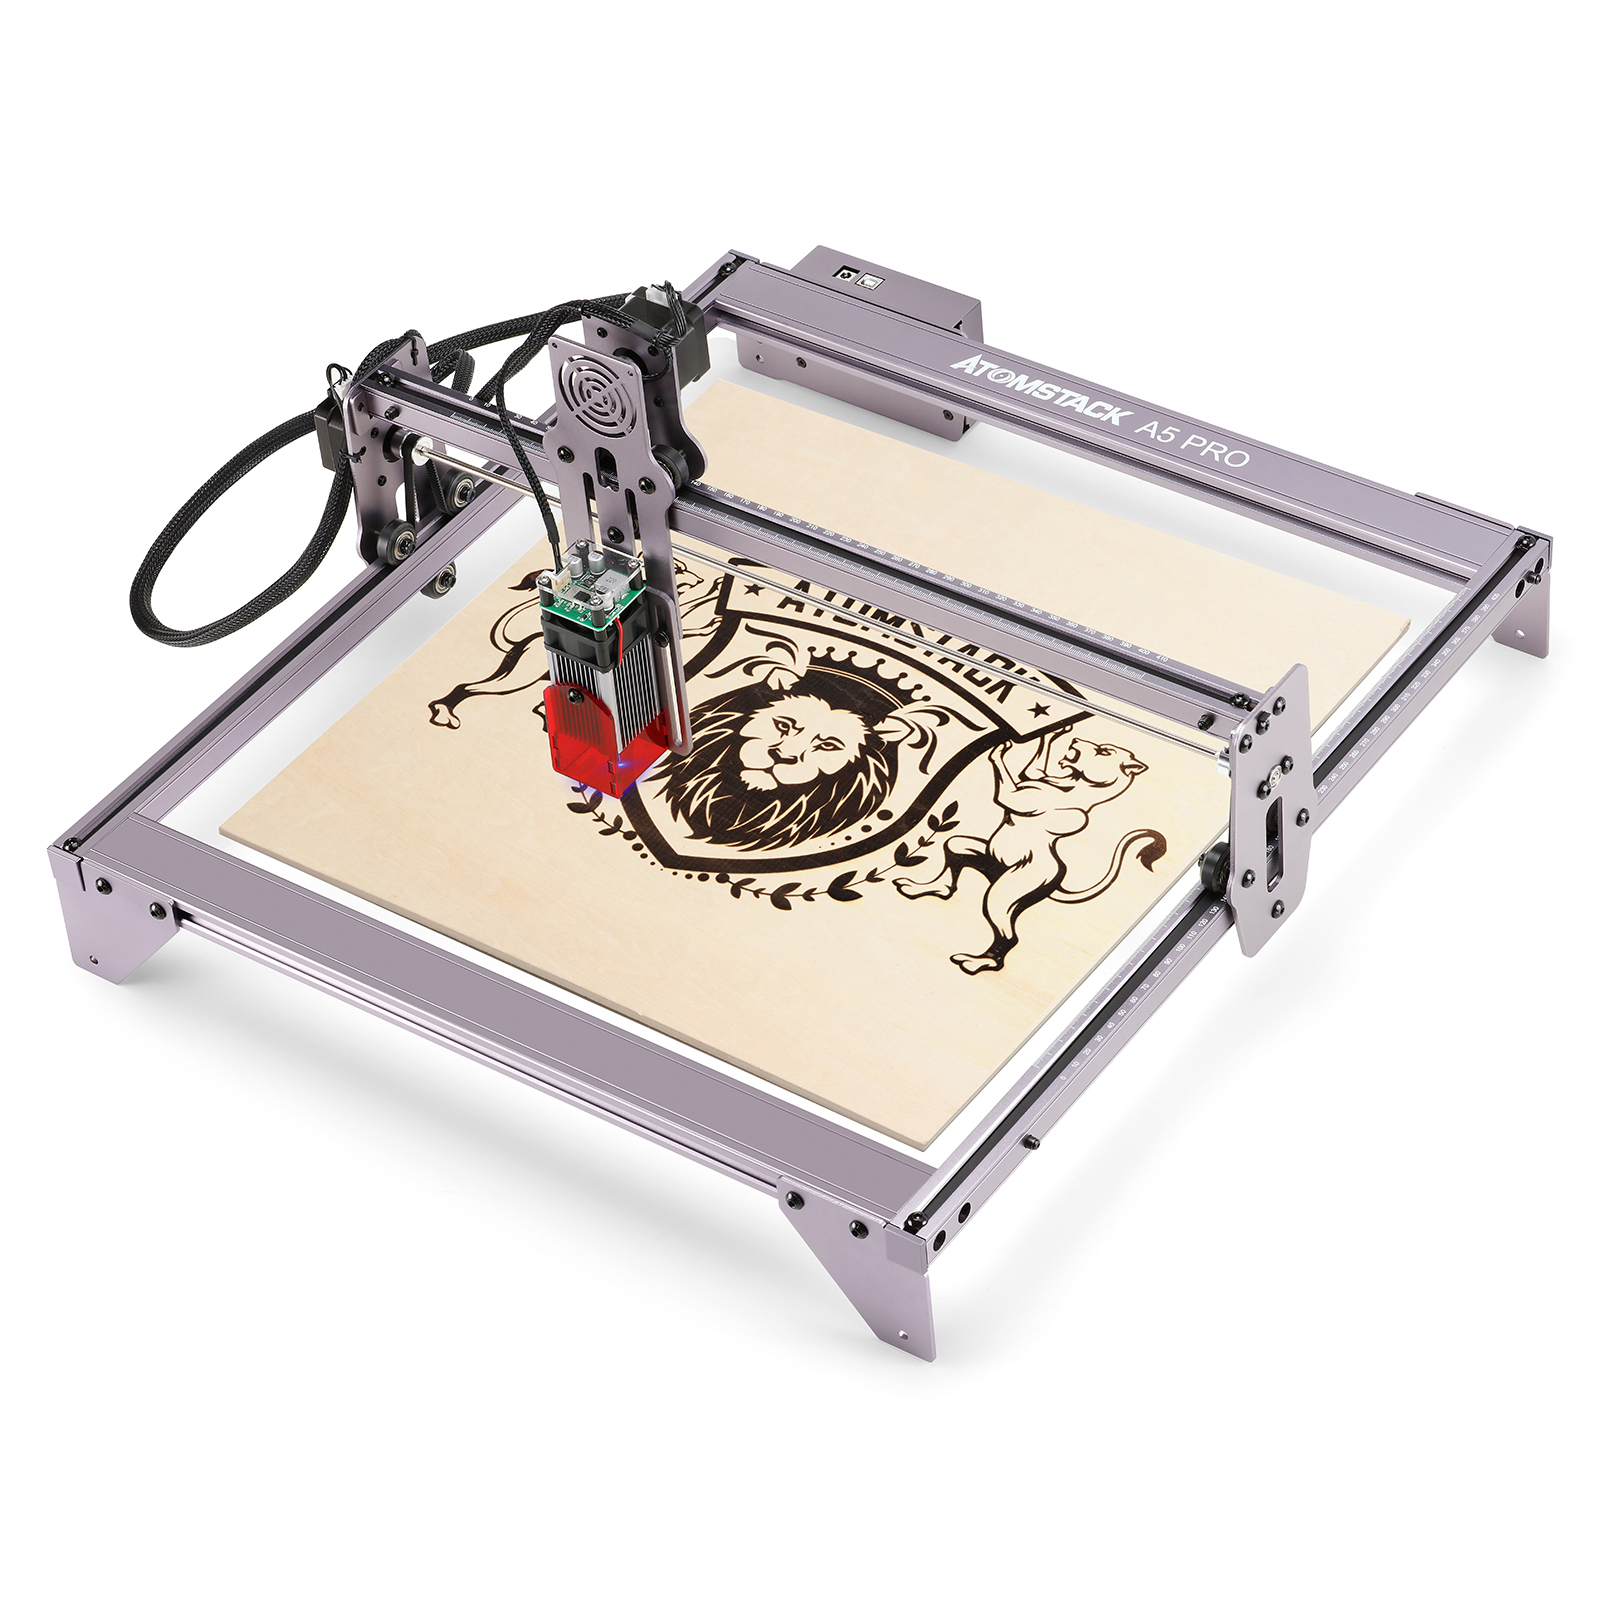
Atomstack contacted me to see if I was interested in reviewing their Atomstack A5 Pro desktop laser engraver. I jumped at the opportunity as I’m always looking for new ways to to make things in the shop and It’s another tool to learn with. I’ve looked at more industrial lasers in the past like Epilog and Universal and more recently the fiber lasers found on eBay. All of those options are well into the thousands of dollars where as the Atomstack A5 Pro can usually be found for around $300. While all these are “lasers” there are some very real differences in capabilities. The Atomstack A5 Pro is an LED based laser where most of the others are CO2 laser based. Those have far more cutting capacity and speed. Lets call the Atomstack A5 Pro a LED desktop laser engraver.
Packaging
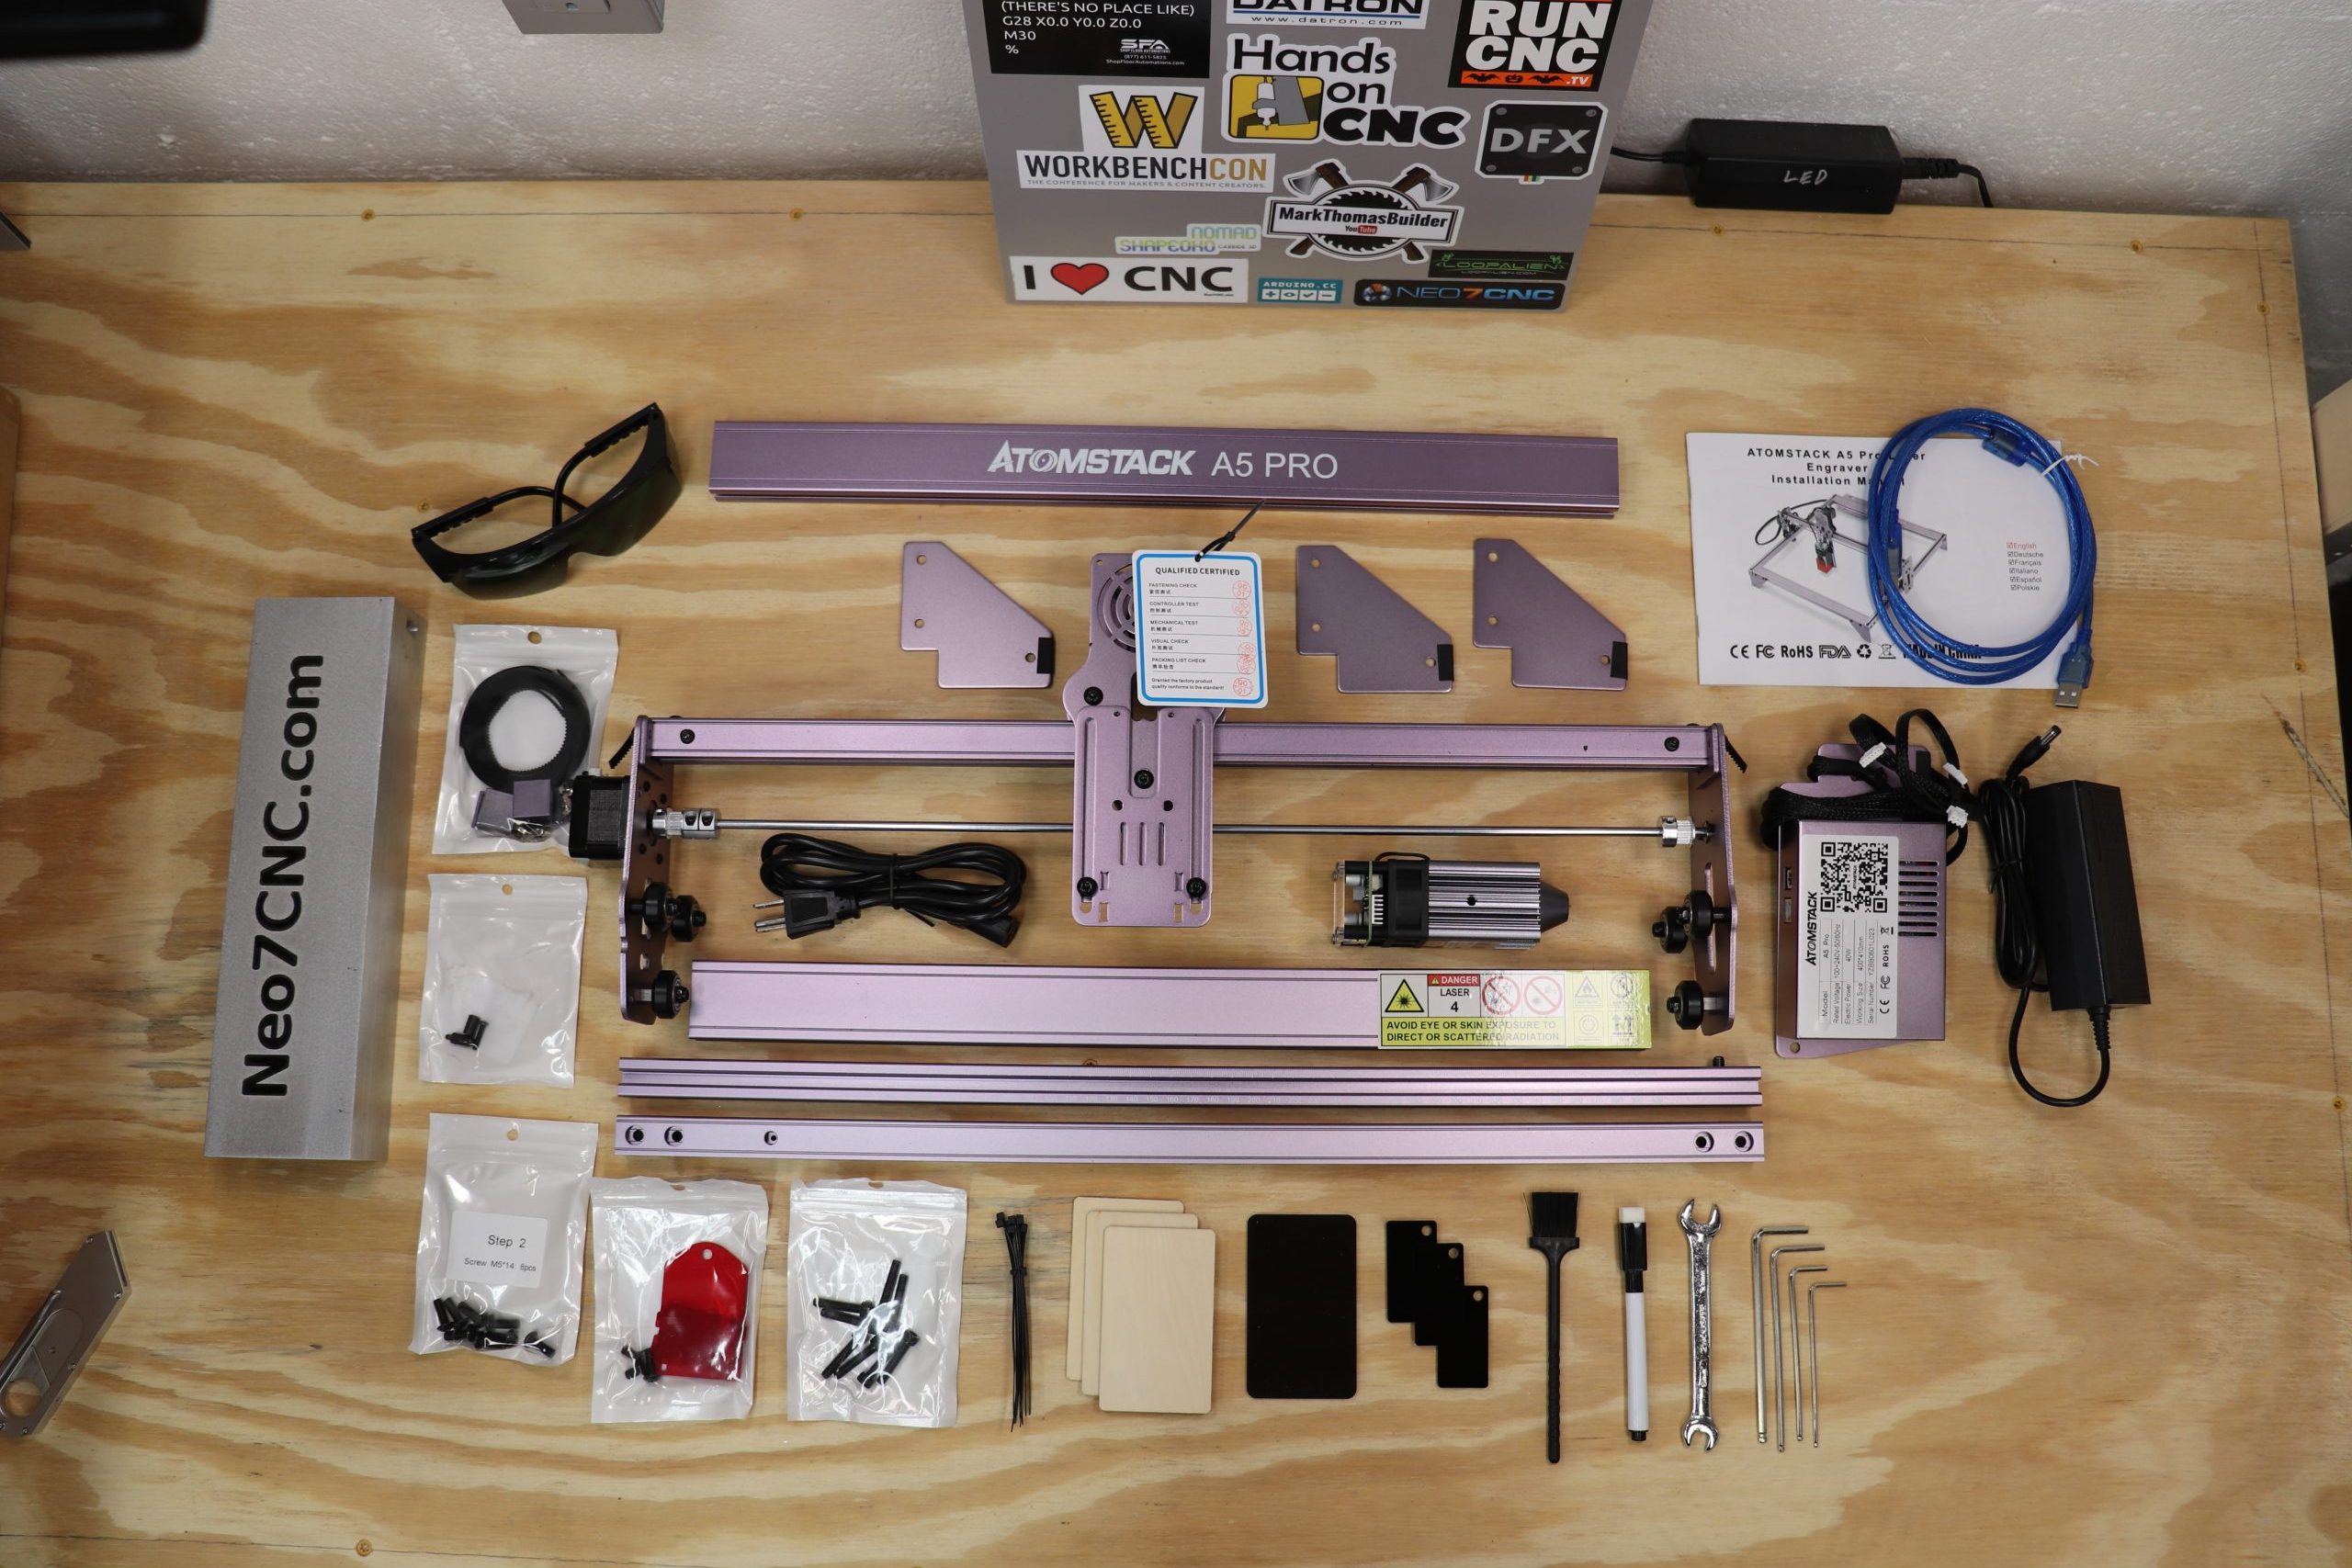
The unit arrived extremely well packed. All the parts and accessories were tucked neatly into a foam enclosure with double stacked pieces like the side rails separated with additional foam. A desiccant pack and extra sturdy corner protectors were also found, adding to the already substantial packaging.
Assembly
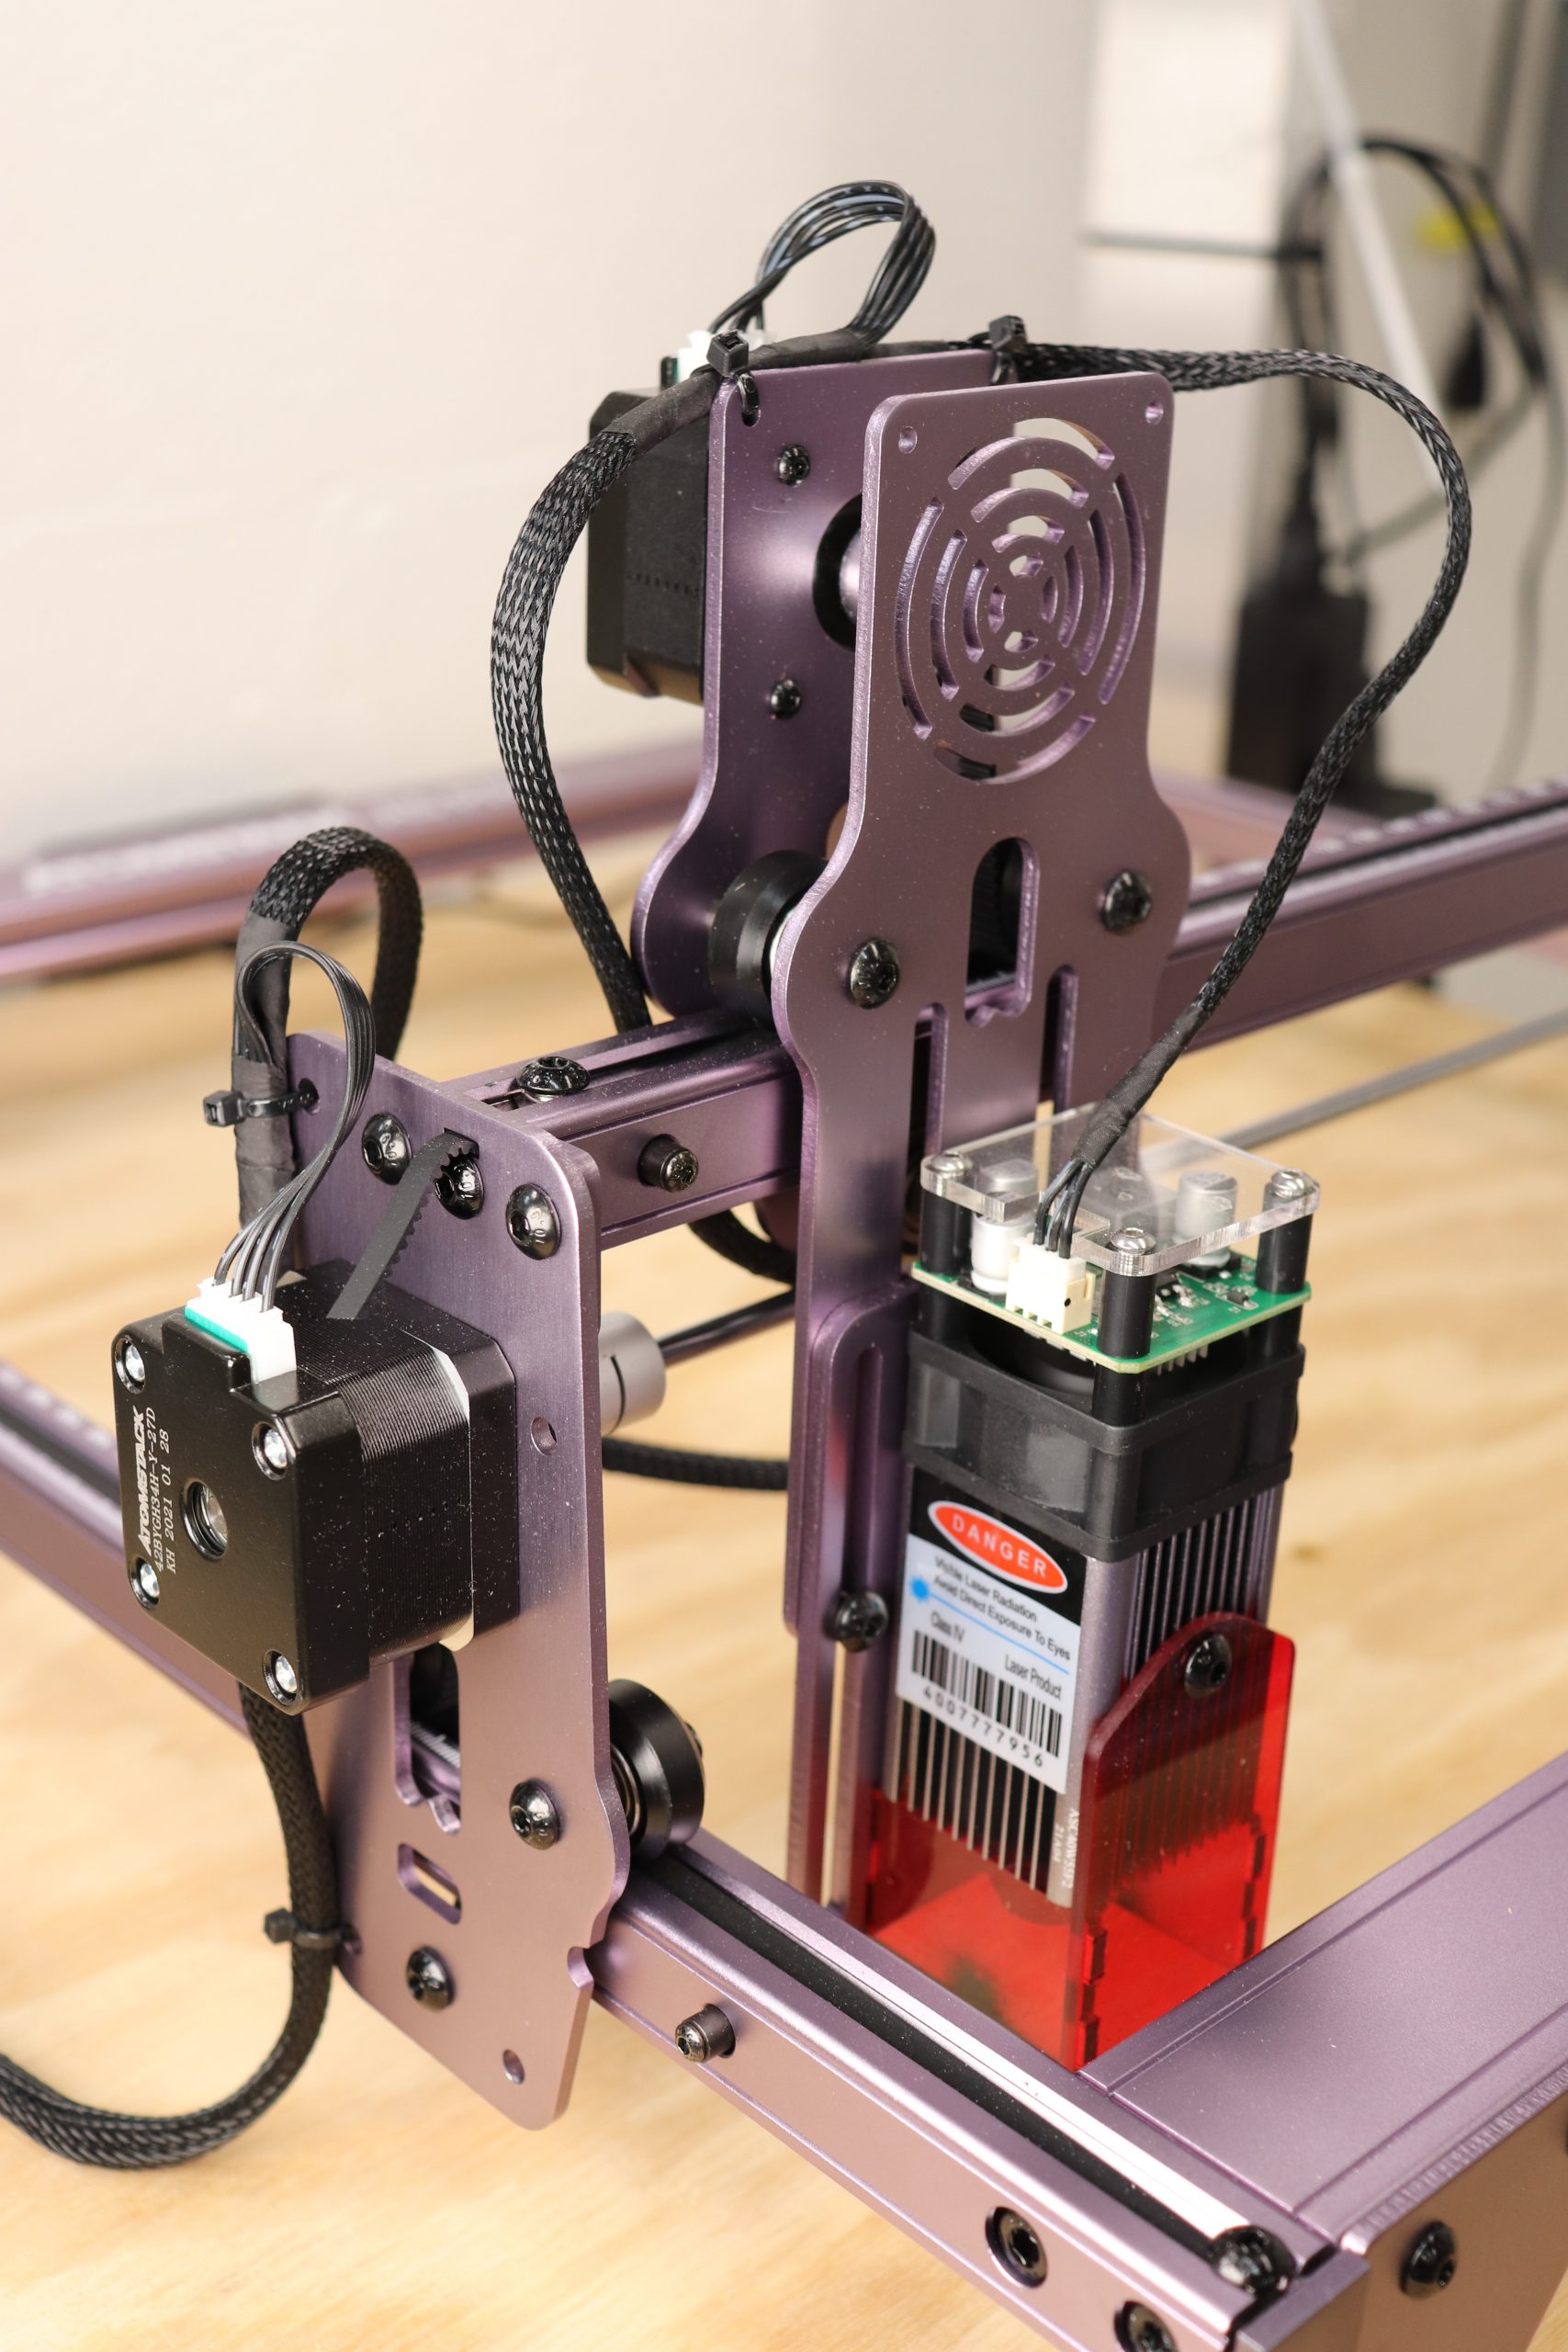
Assembly was a breeze with all the needed tools being included with the laser. It took me less than 30 minutes to have the unit fully assembled. That number would have been closer to 20 if I hadn’t been setting up taking pictures at the same time. The X axis (bridge) comes pre-assembled, so only the front, back and side rails have to be assemble with a total of 16 small bolts (4 per corner) connected to the feet. The back left foot is actually the controller. I though that was a great use of space. the unit fits nicely into a 26x26x12 inch (660x660x304mm) area not including any enclosure for fume extraction. The assembly guide is very easy to follow, The only thing I noticed was that the early pages show the laser head installed even though you’ve not been instructed to do so yet. Not a big deal seeing that the laser head attaches to the X axis with 2 screws but I thought I’d mention the lack of continuity in the guide. Once I finished the hardware assembly I found myself having a “what now” moment. I turned to the Atomstack website for answers and found the user manual. It pointed me towards installing software to be able to use the A5 Pro.
Safety
The manual also cover the very important aspects of safety and they can’t be repeated enough. Though small, this is a laser that can cause serious damage. Read and follow all the safety warnings. Use the included laser safety glasses, insure that the plastic guards at the end of the laser head are installed as instructed, make sure what you’re cutting won’t give off toxic fumes (like PVC, ABS, Epoxies, etc.), Use only in an extremely well ventilated space and don’t stare at the beam. Safety is your responsibility… you have been warned.
Fume Extraction
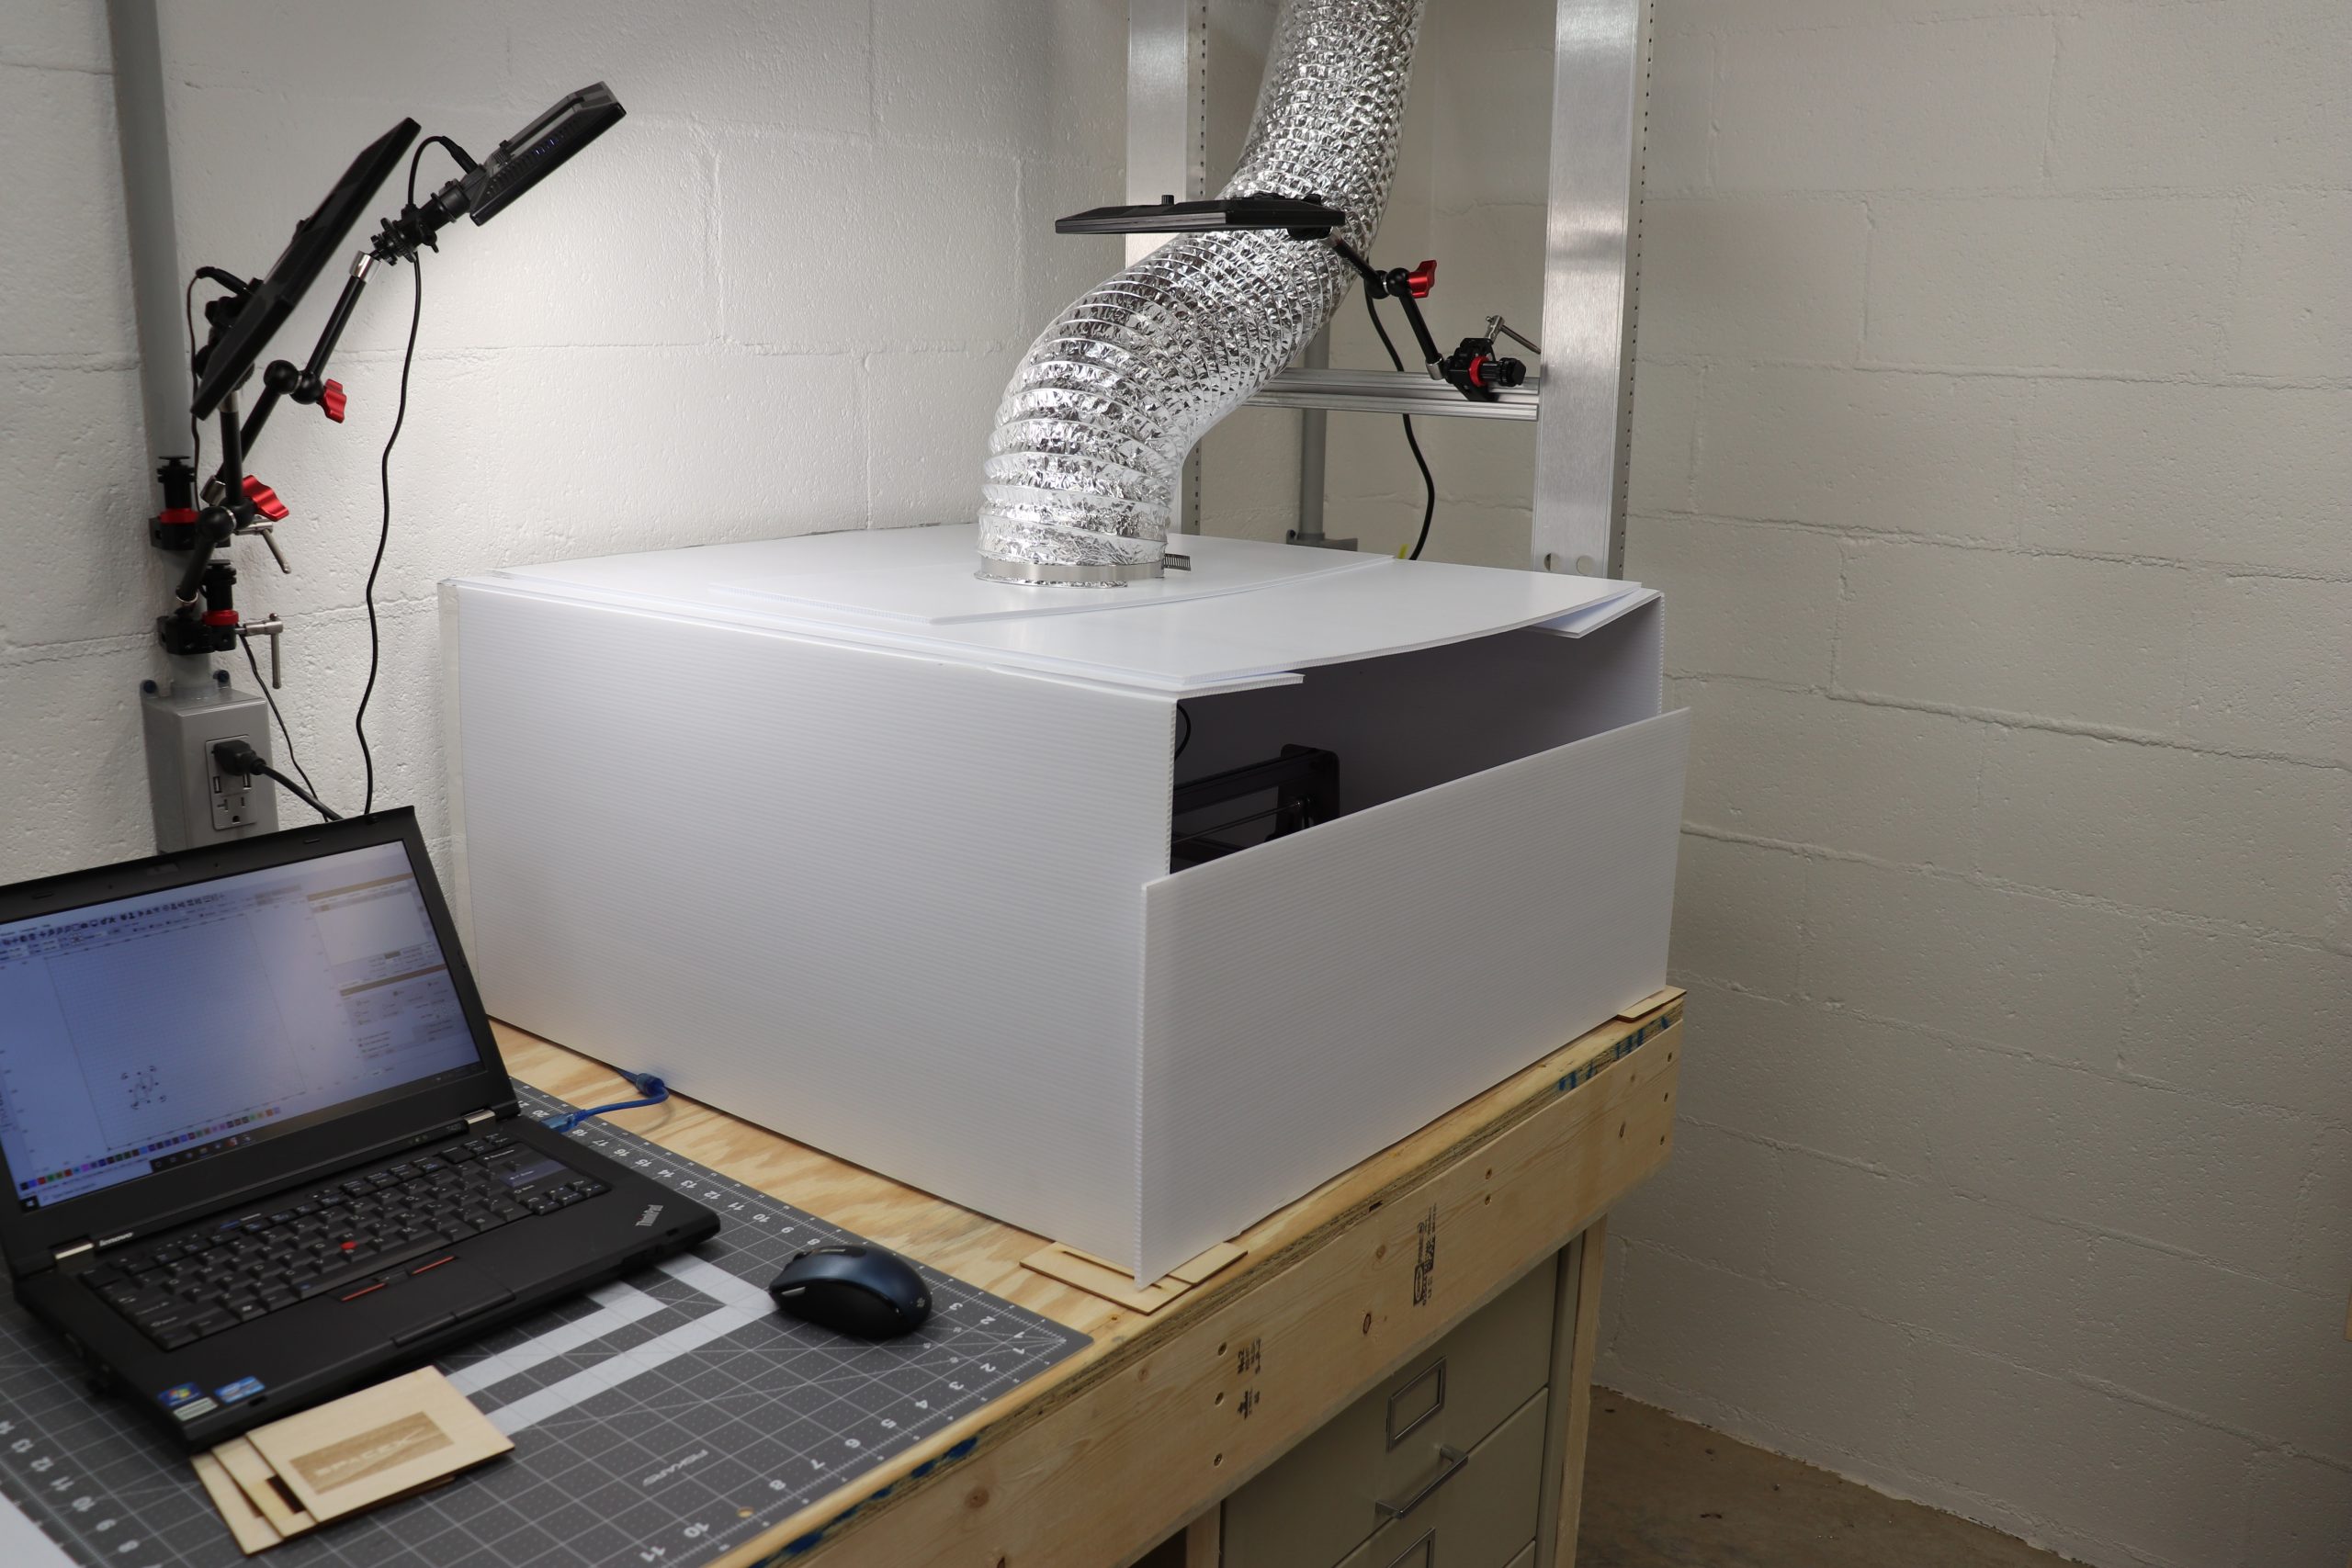
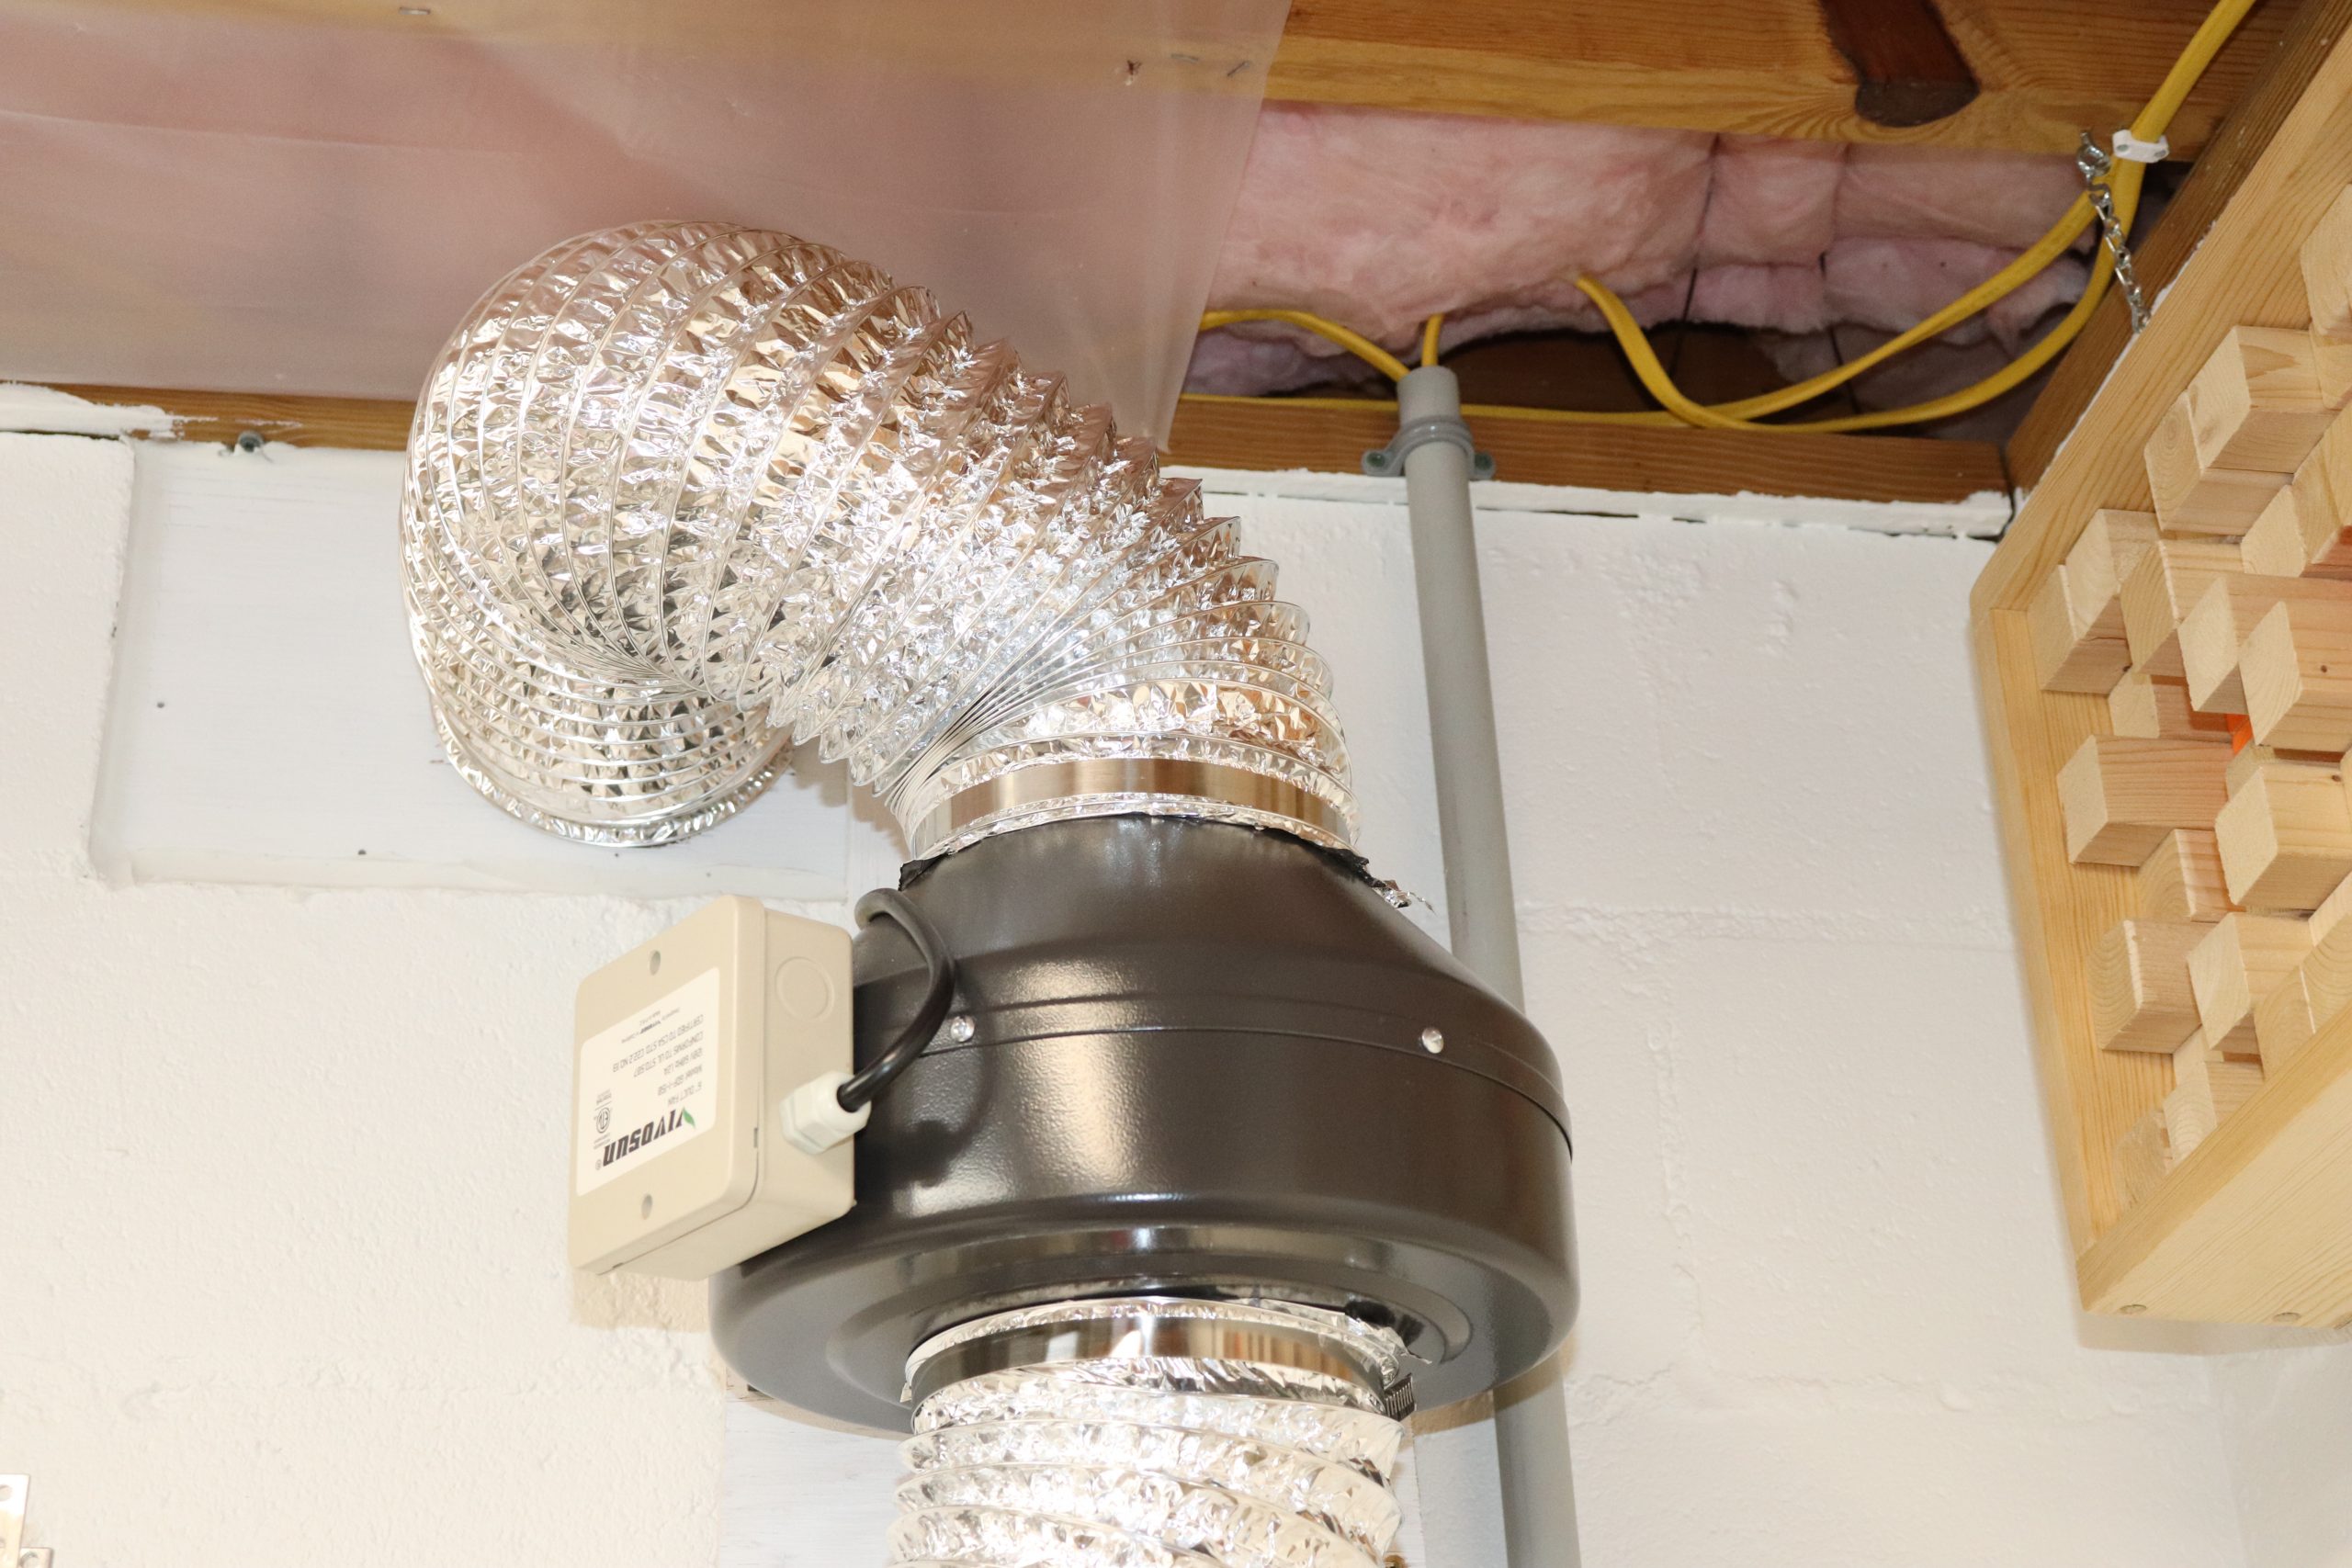
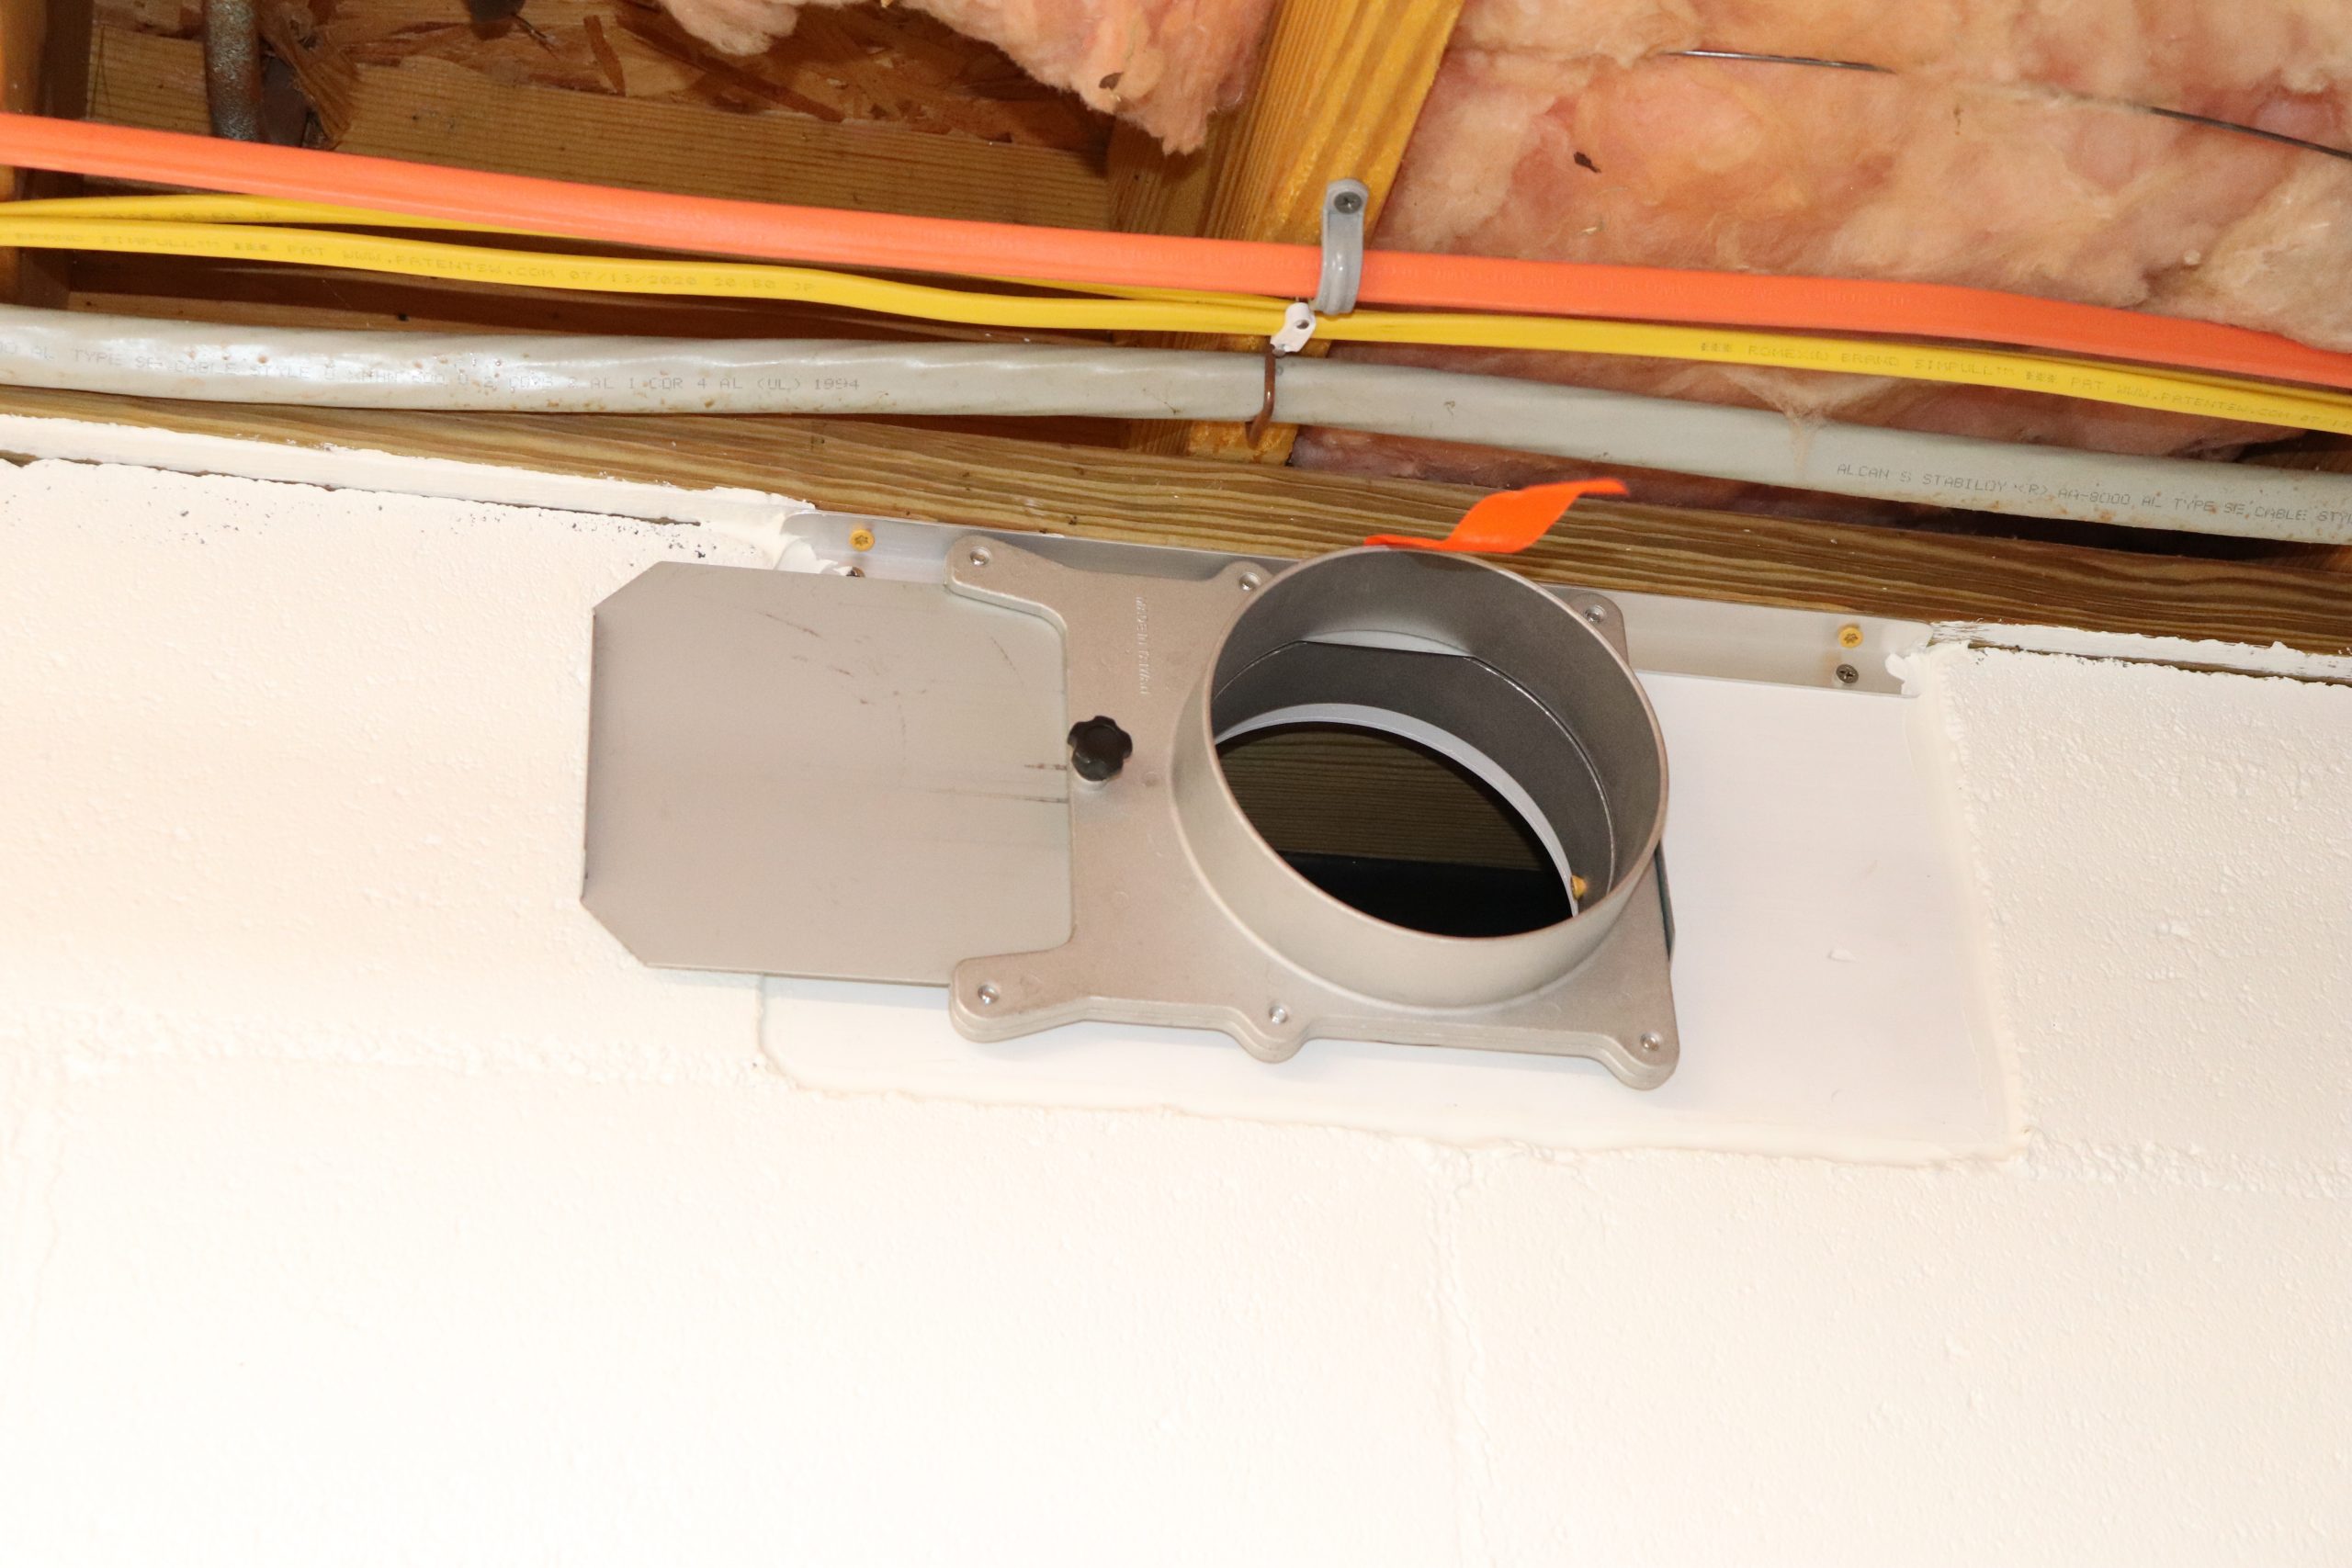
I setup a basic fume extraction system with an inline 6″ fan, some 6″ ducting and a 6″ blast gate. I created a simple enclosure with some 24×36 inch sheets of corrugated plastic. I was pleased with how well it works. The fan pulls from the enclosure and vents to the outside. the blast gate is allowing fresh air in from the outside (well away from the exhaust) so that the fan has the ability to pull freely.
Software
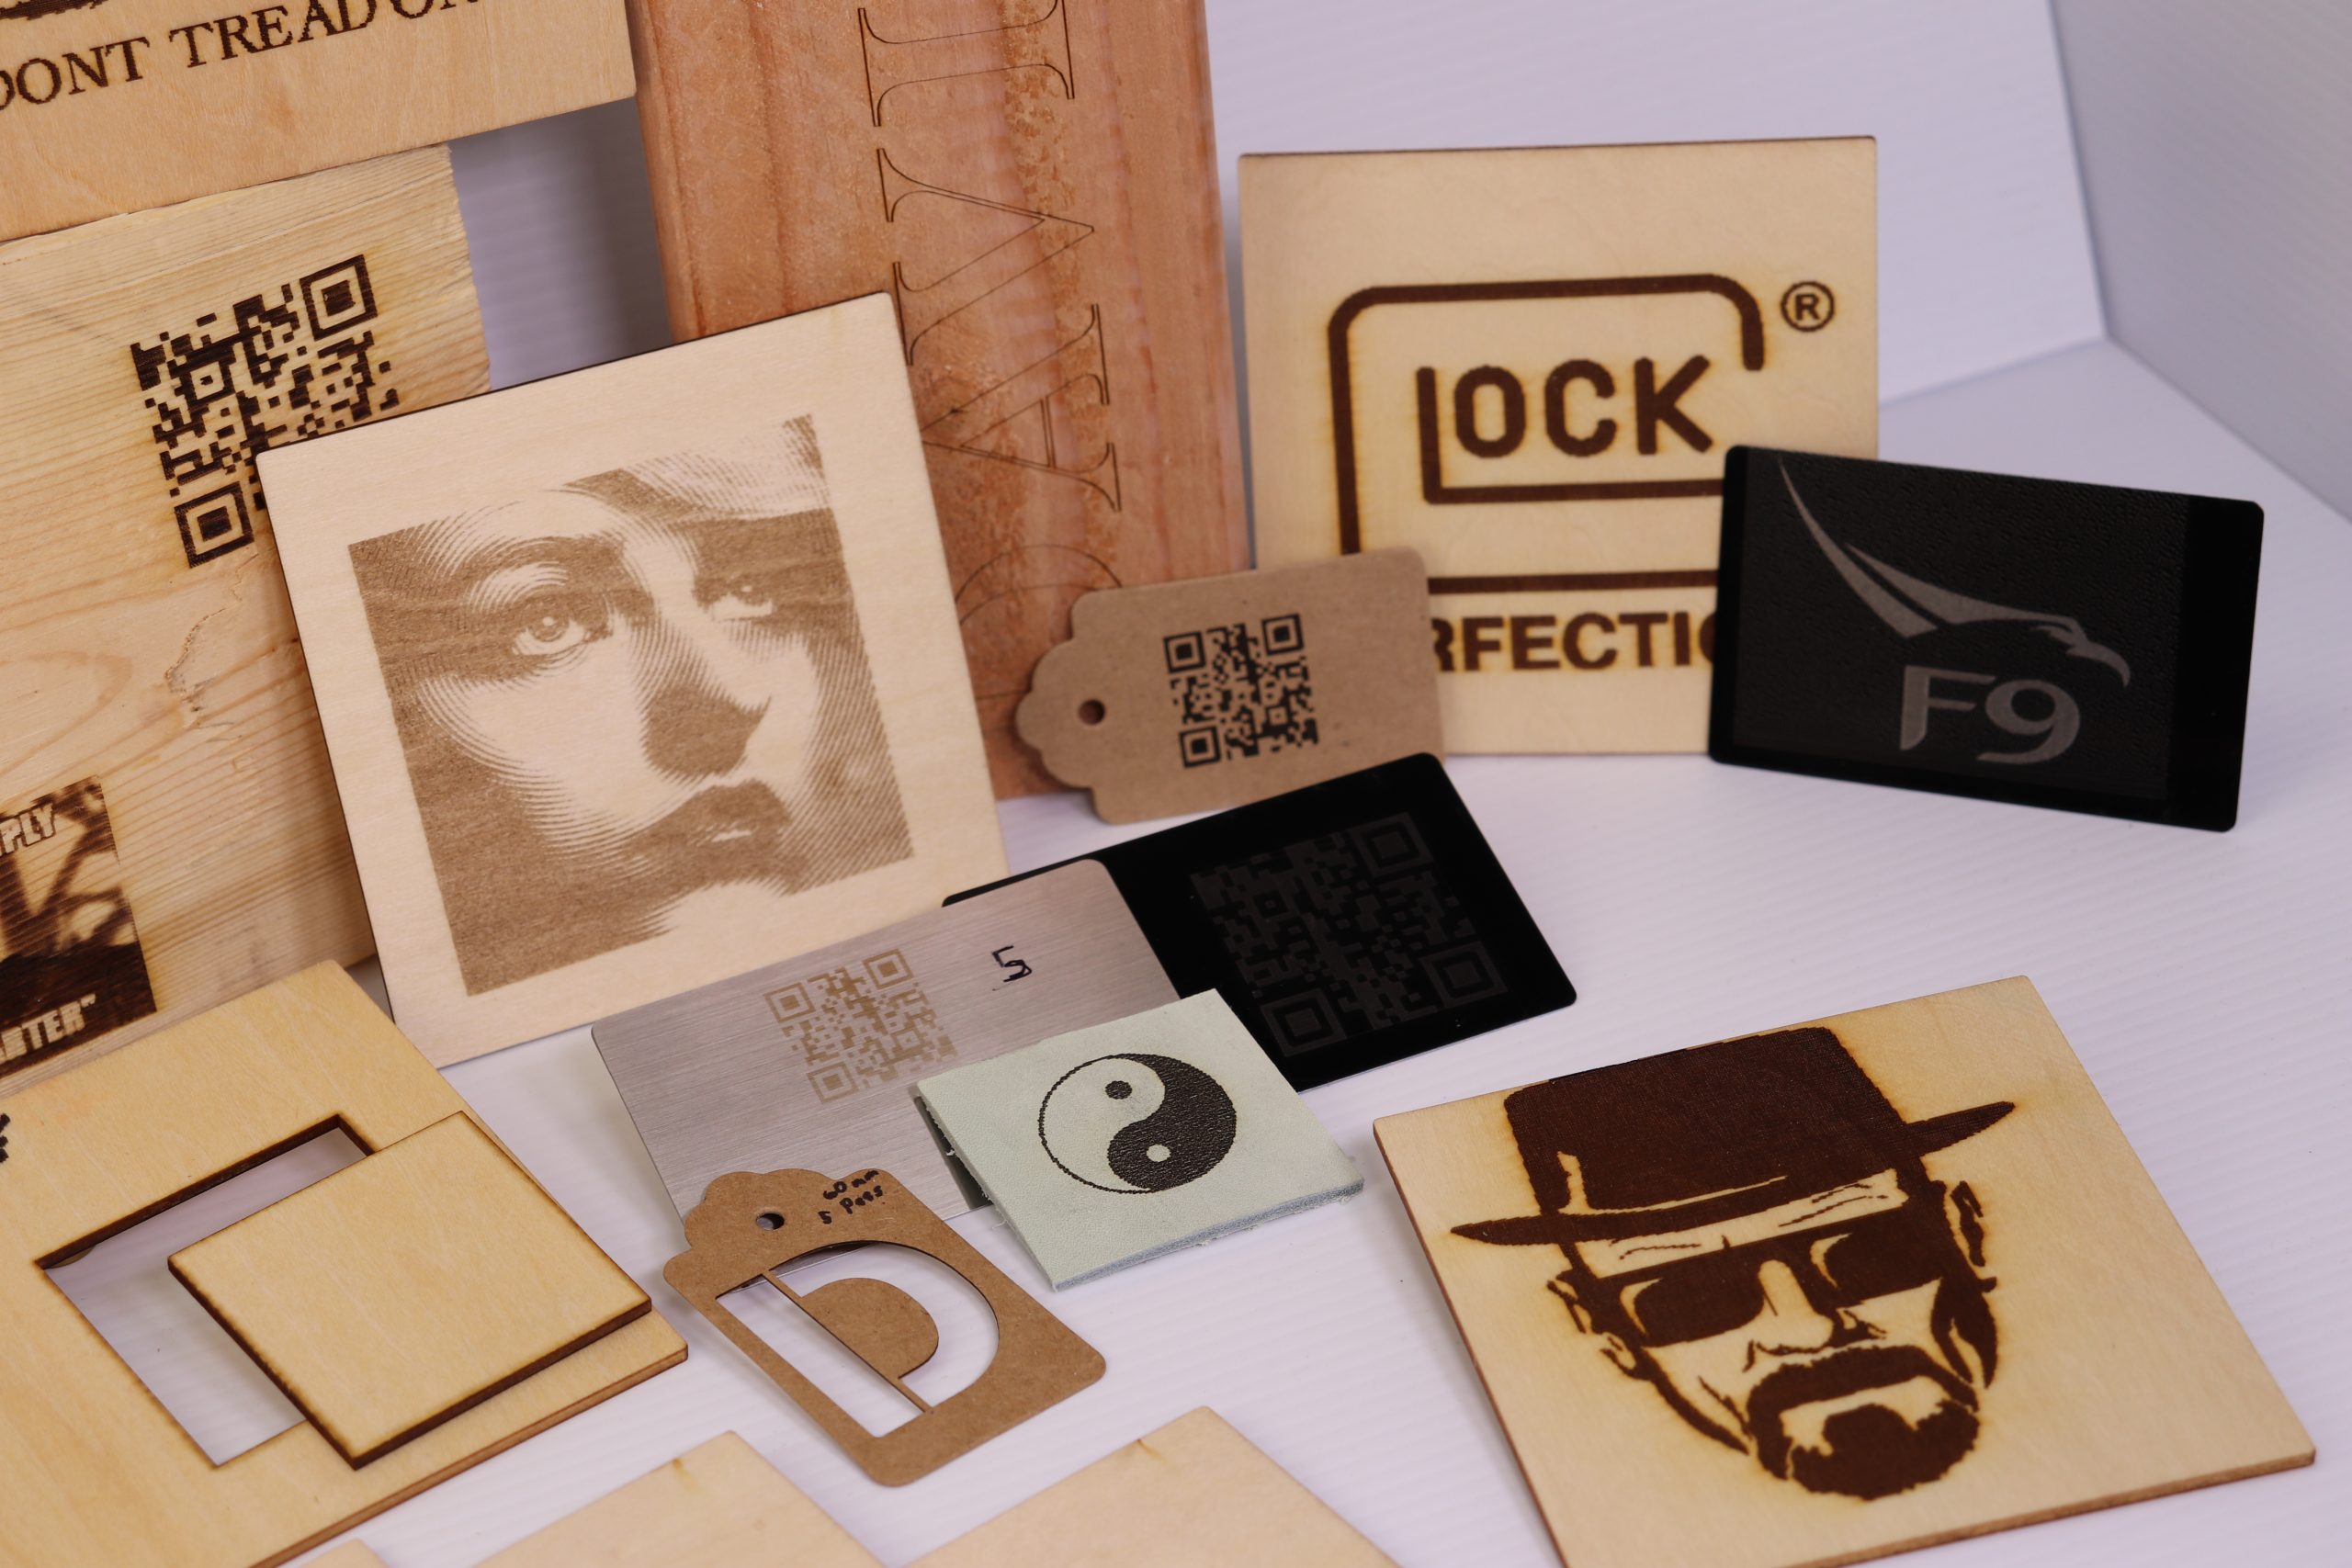
I started with LaserGRBL. It’s a straightforward free program. The manual does a good job getting you going in the right direction. I found it easy to use for basic engraving jobs. Once I wanted to try and cut items, I moved over to Lightburn ($40 version). It is feature rich compared to LaserGRBL but that shouldn’t diminish LaserGRBL. I think they both have their place and I found myself switching back and forth between the two. I’d use LaserGRBL for basic engraving and then move to Lightburn for cutting or on the fly creation as it allows you to draw, type, scale, etc. right in the program.
Summary
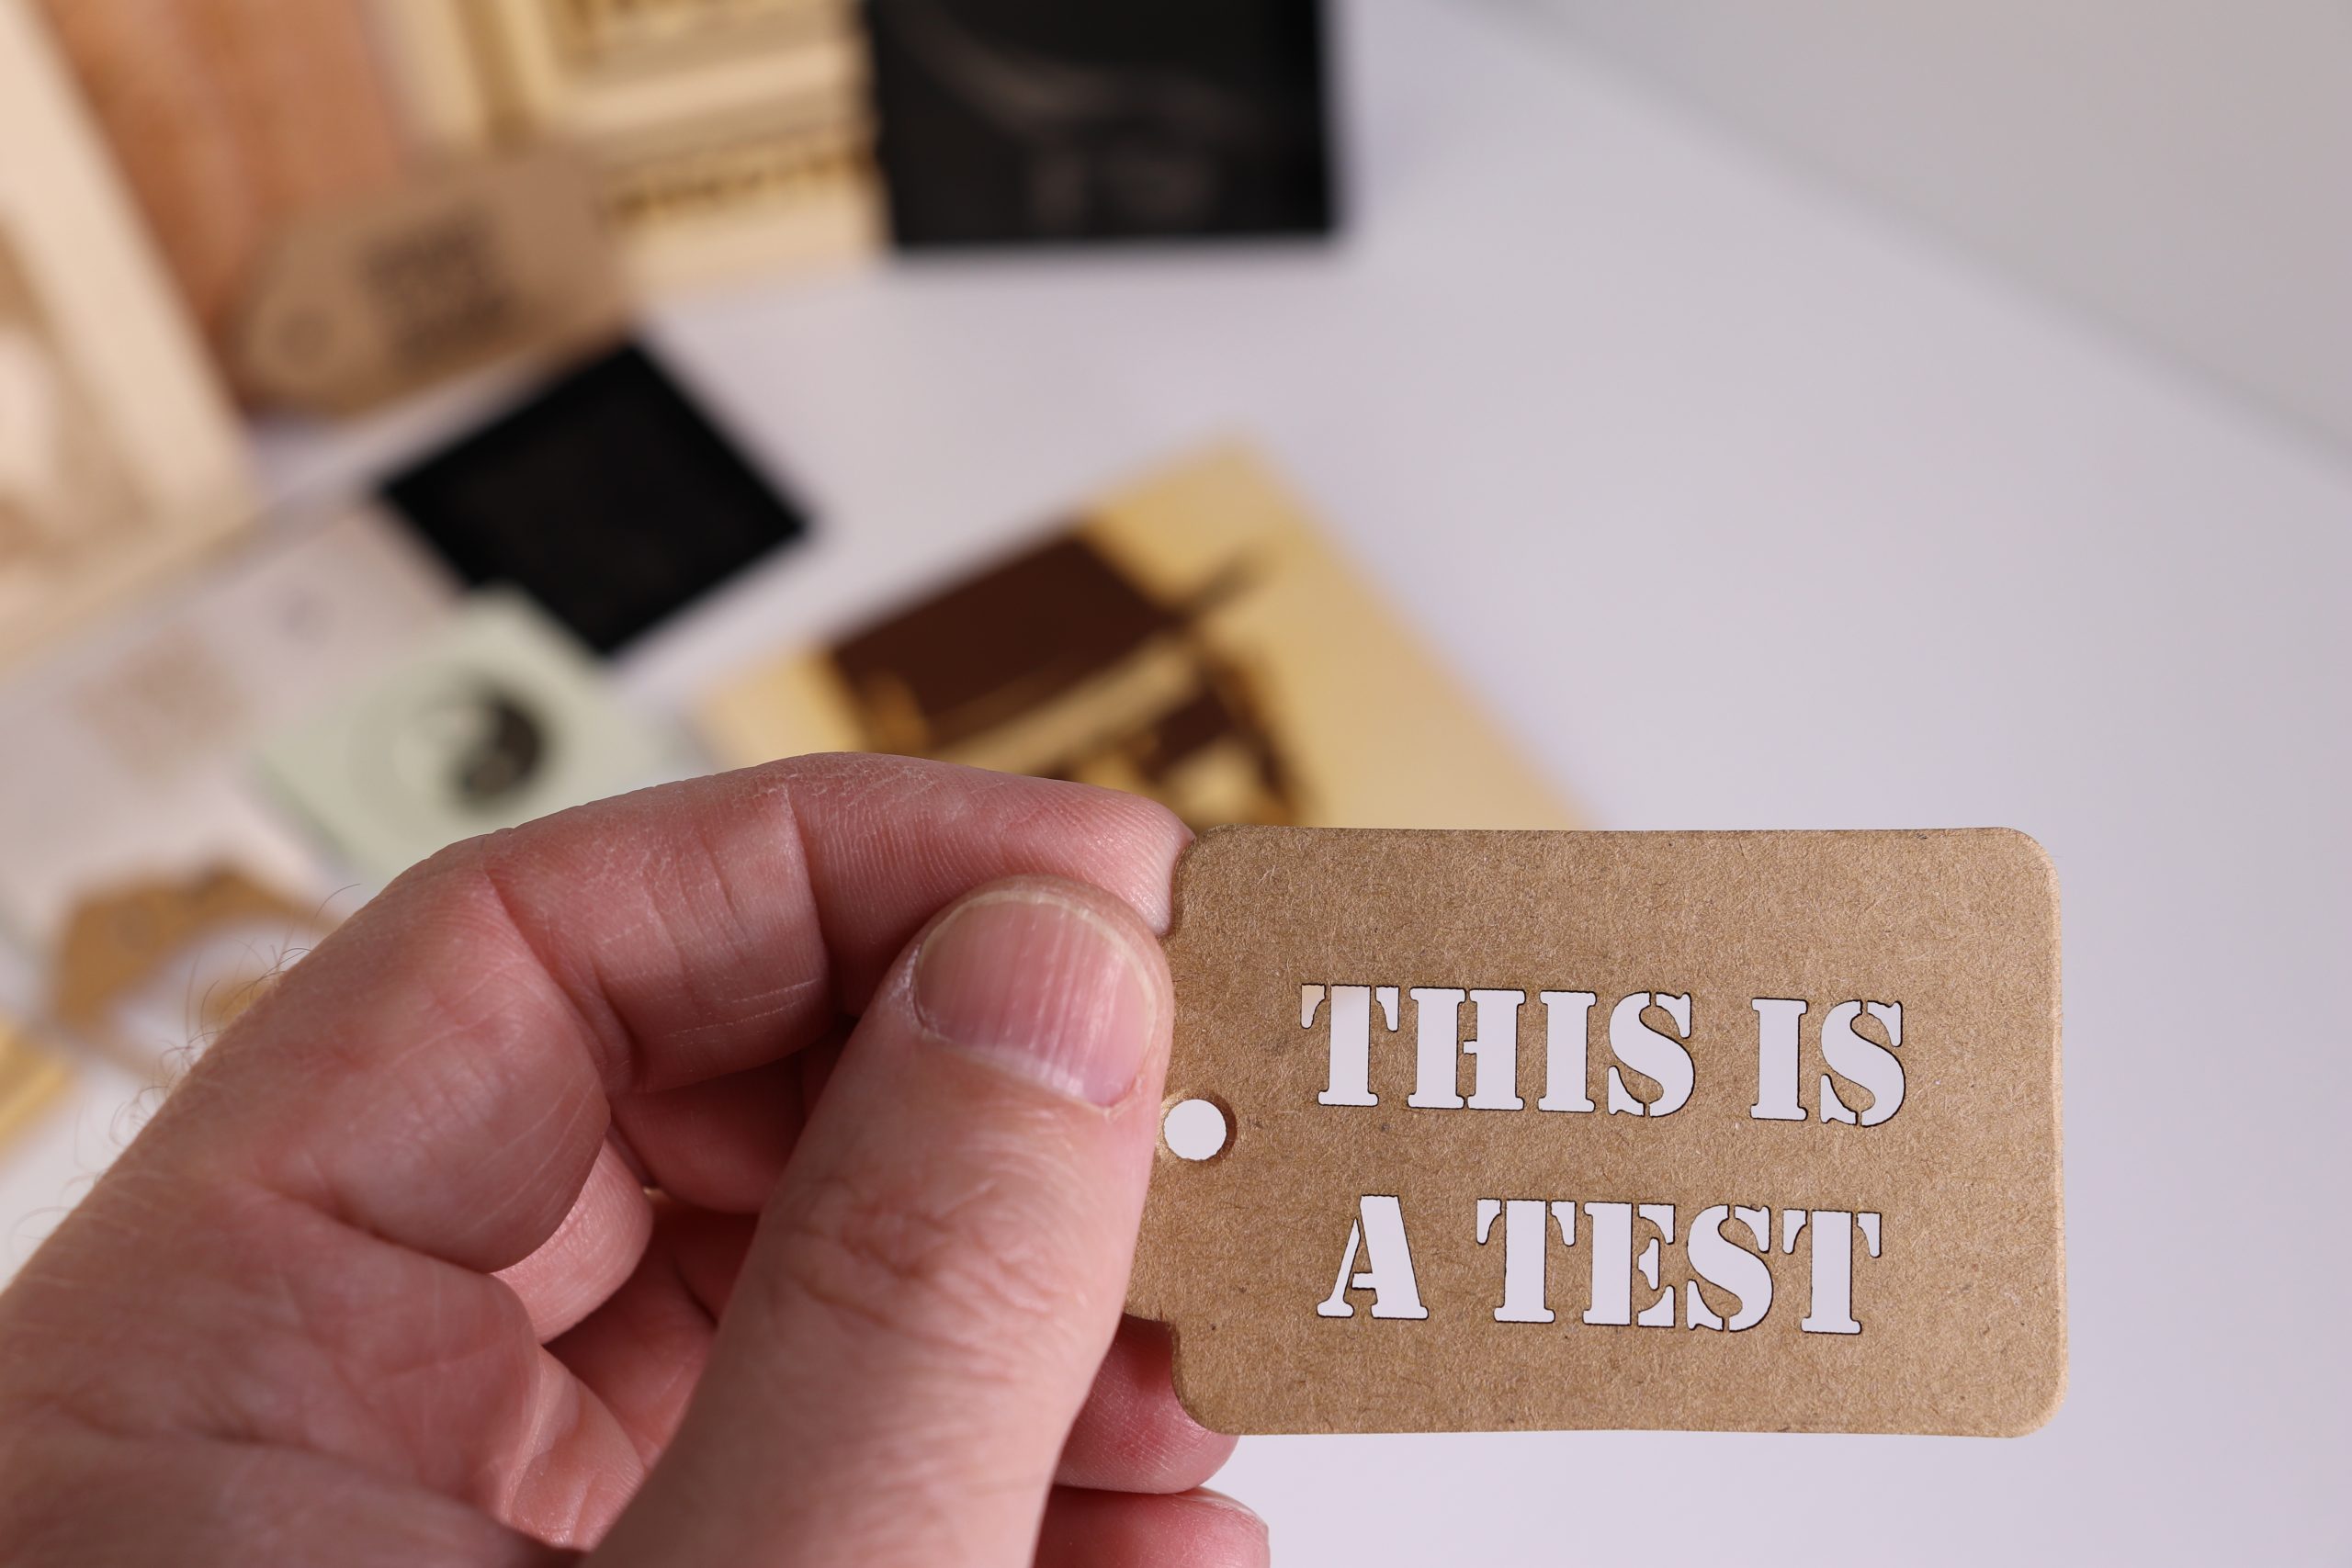
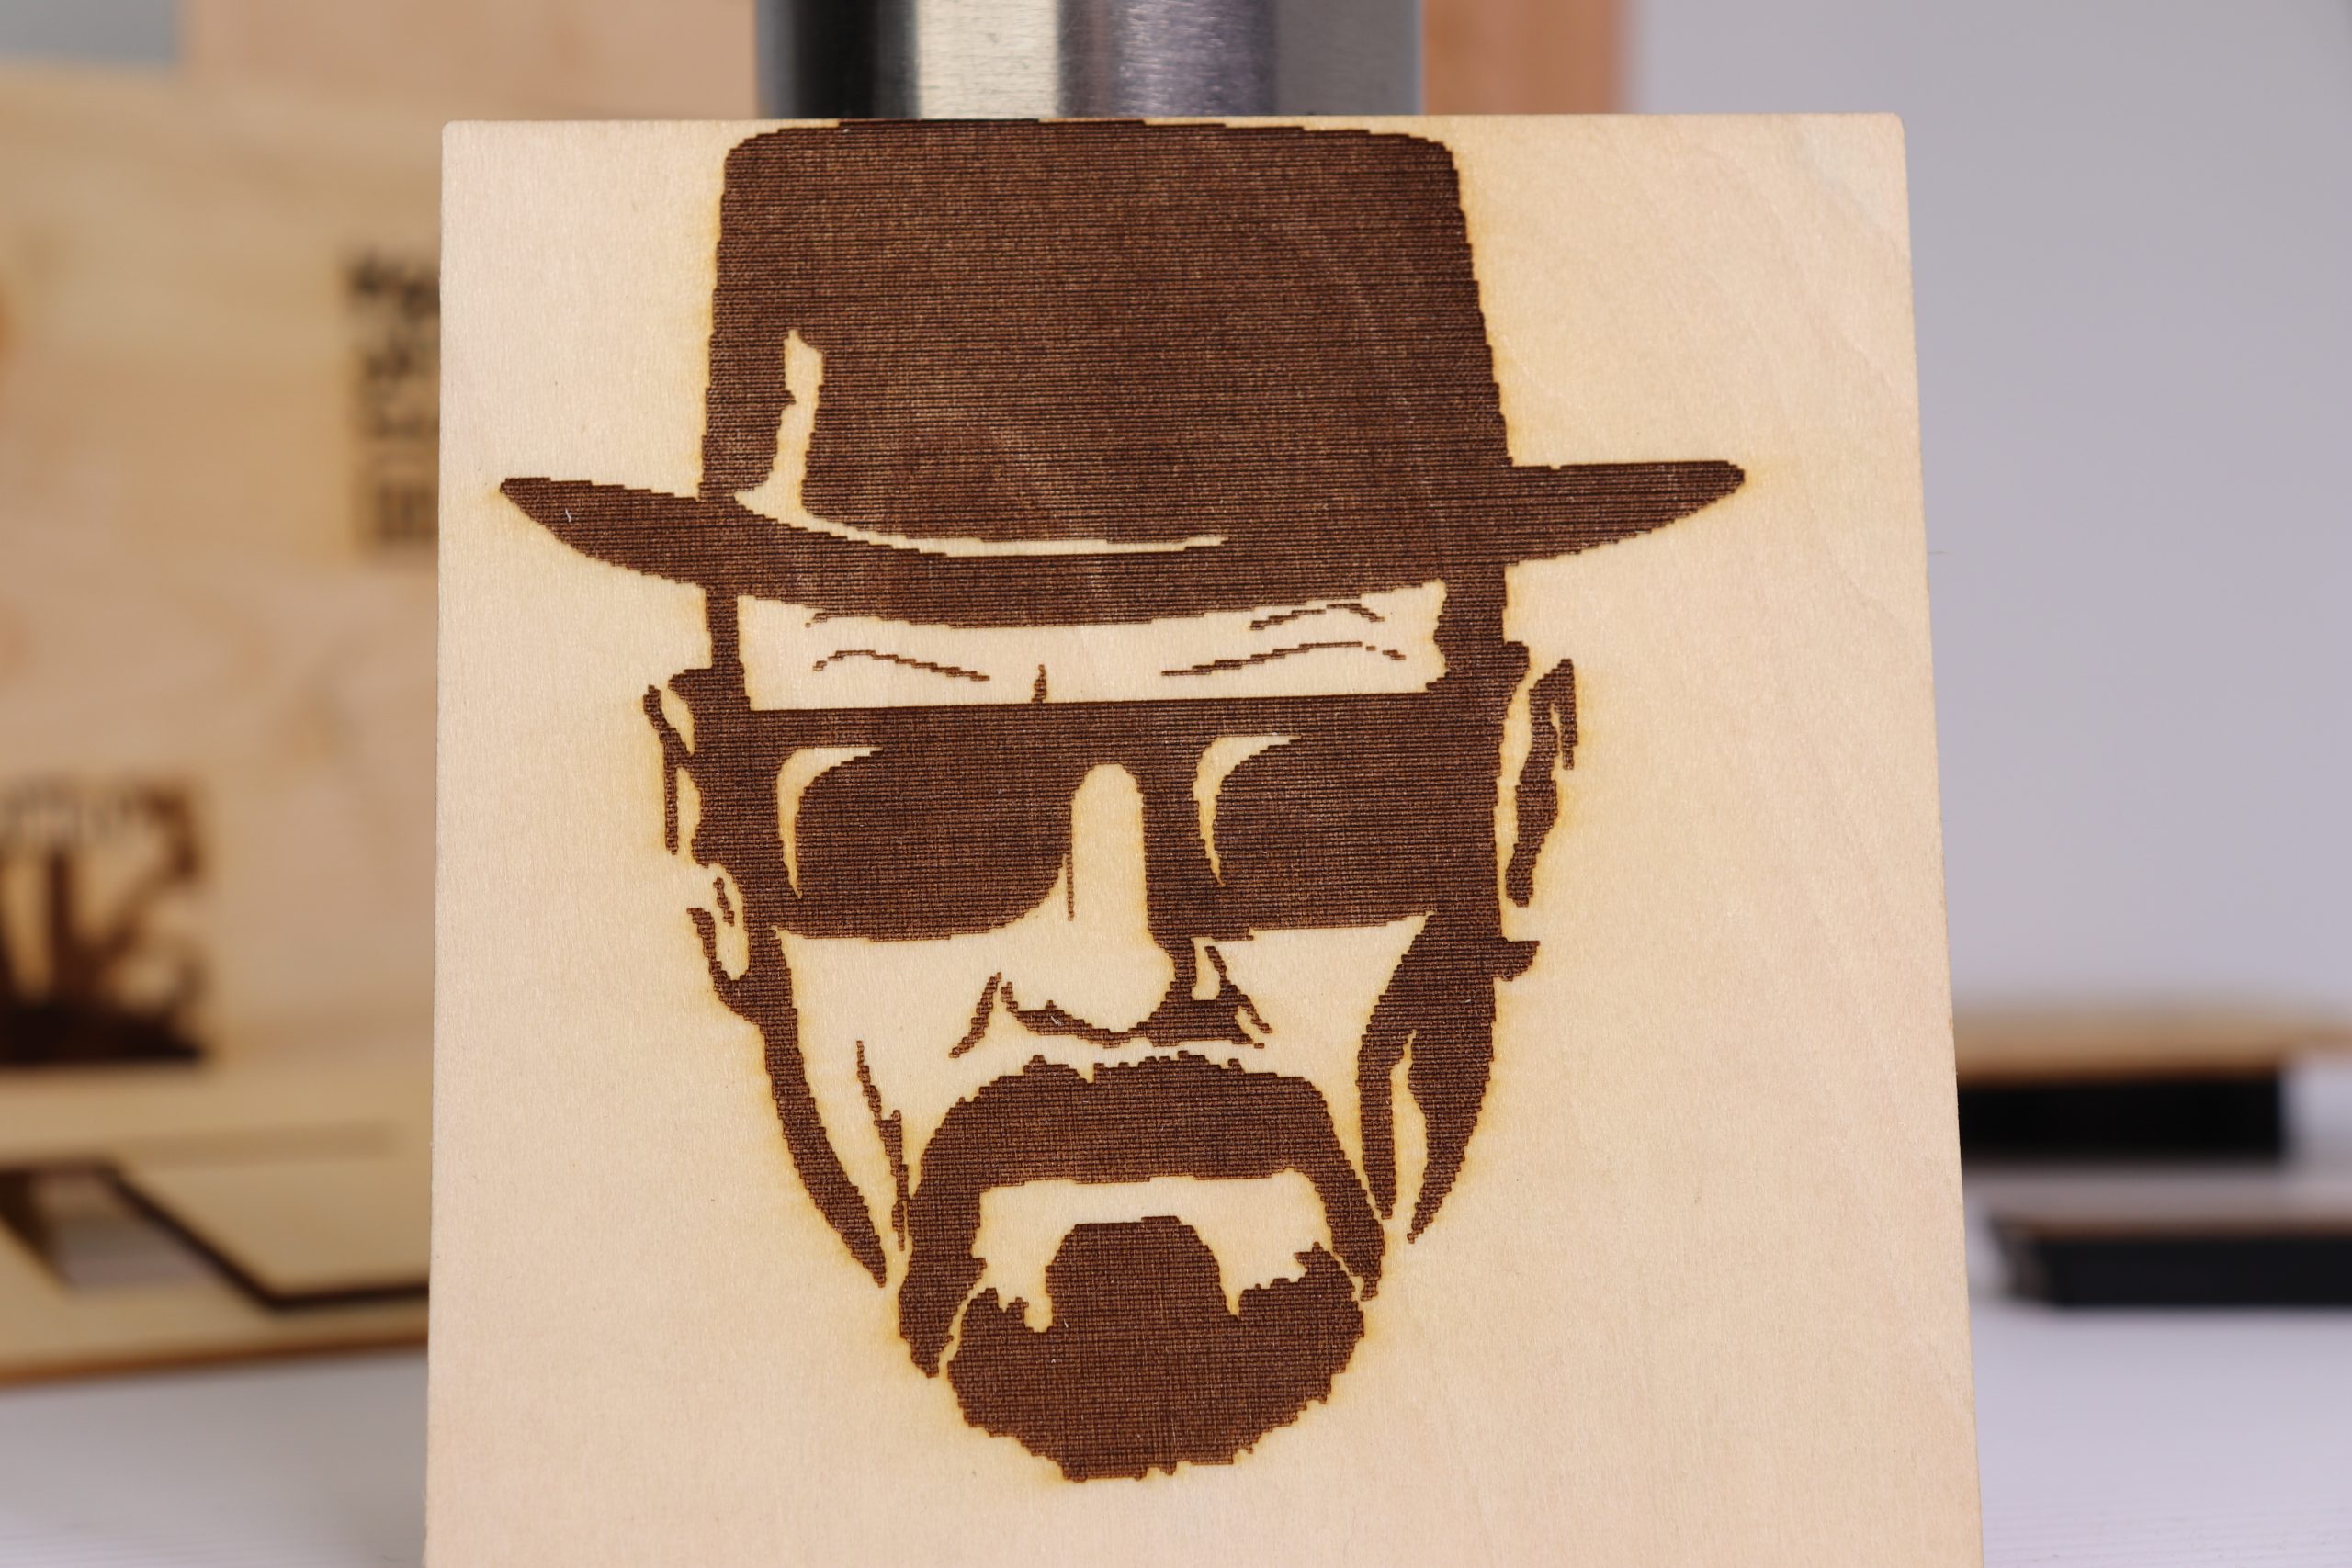
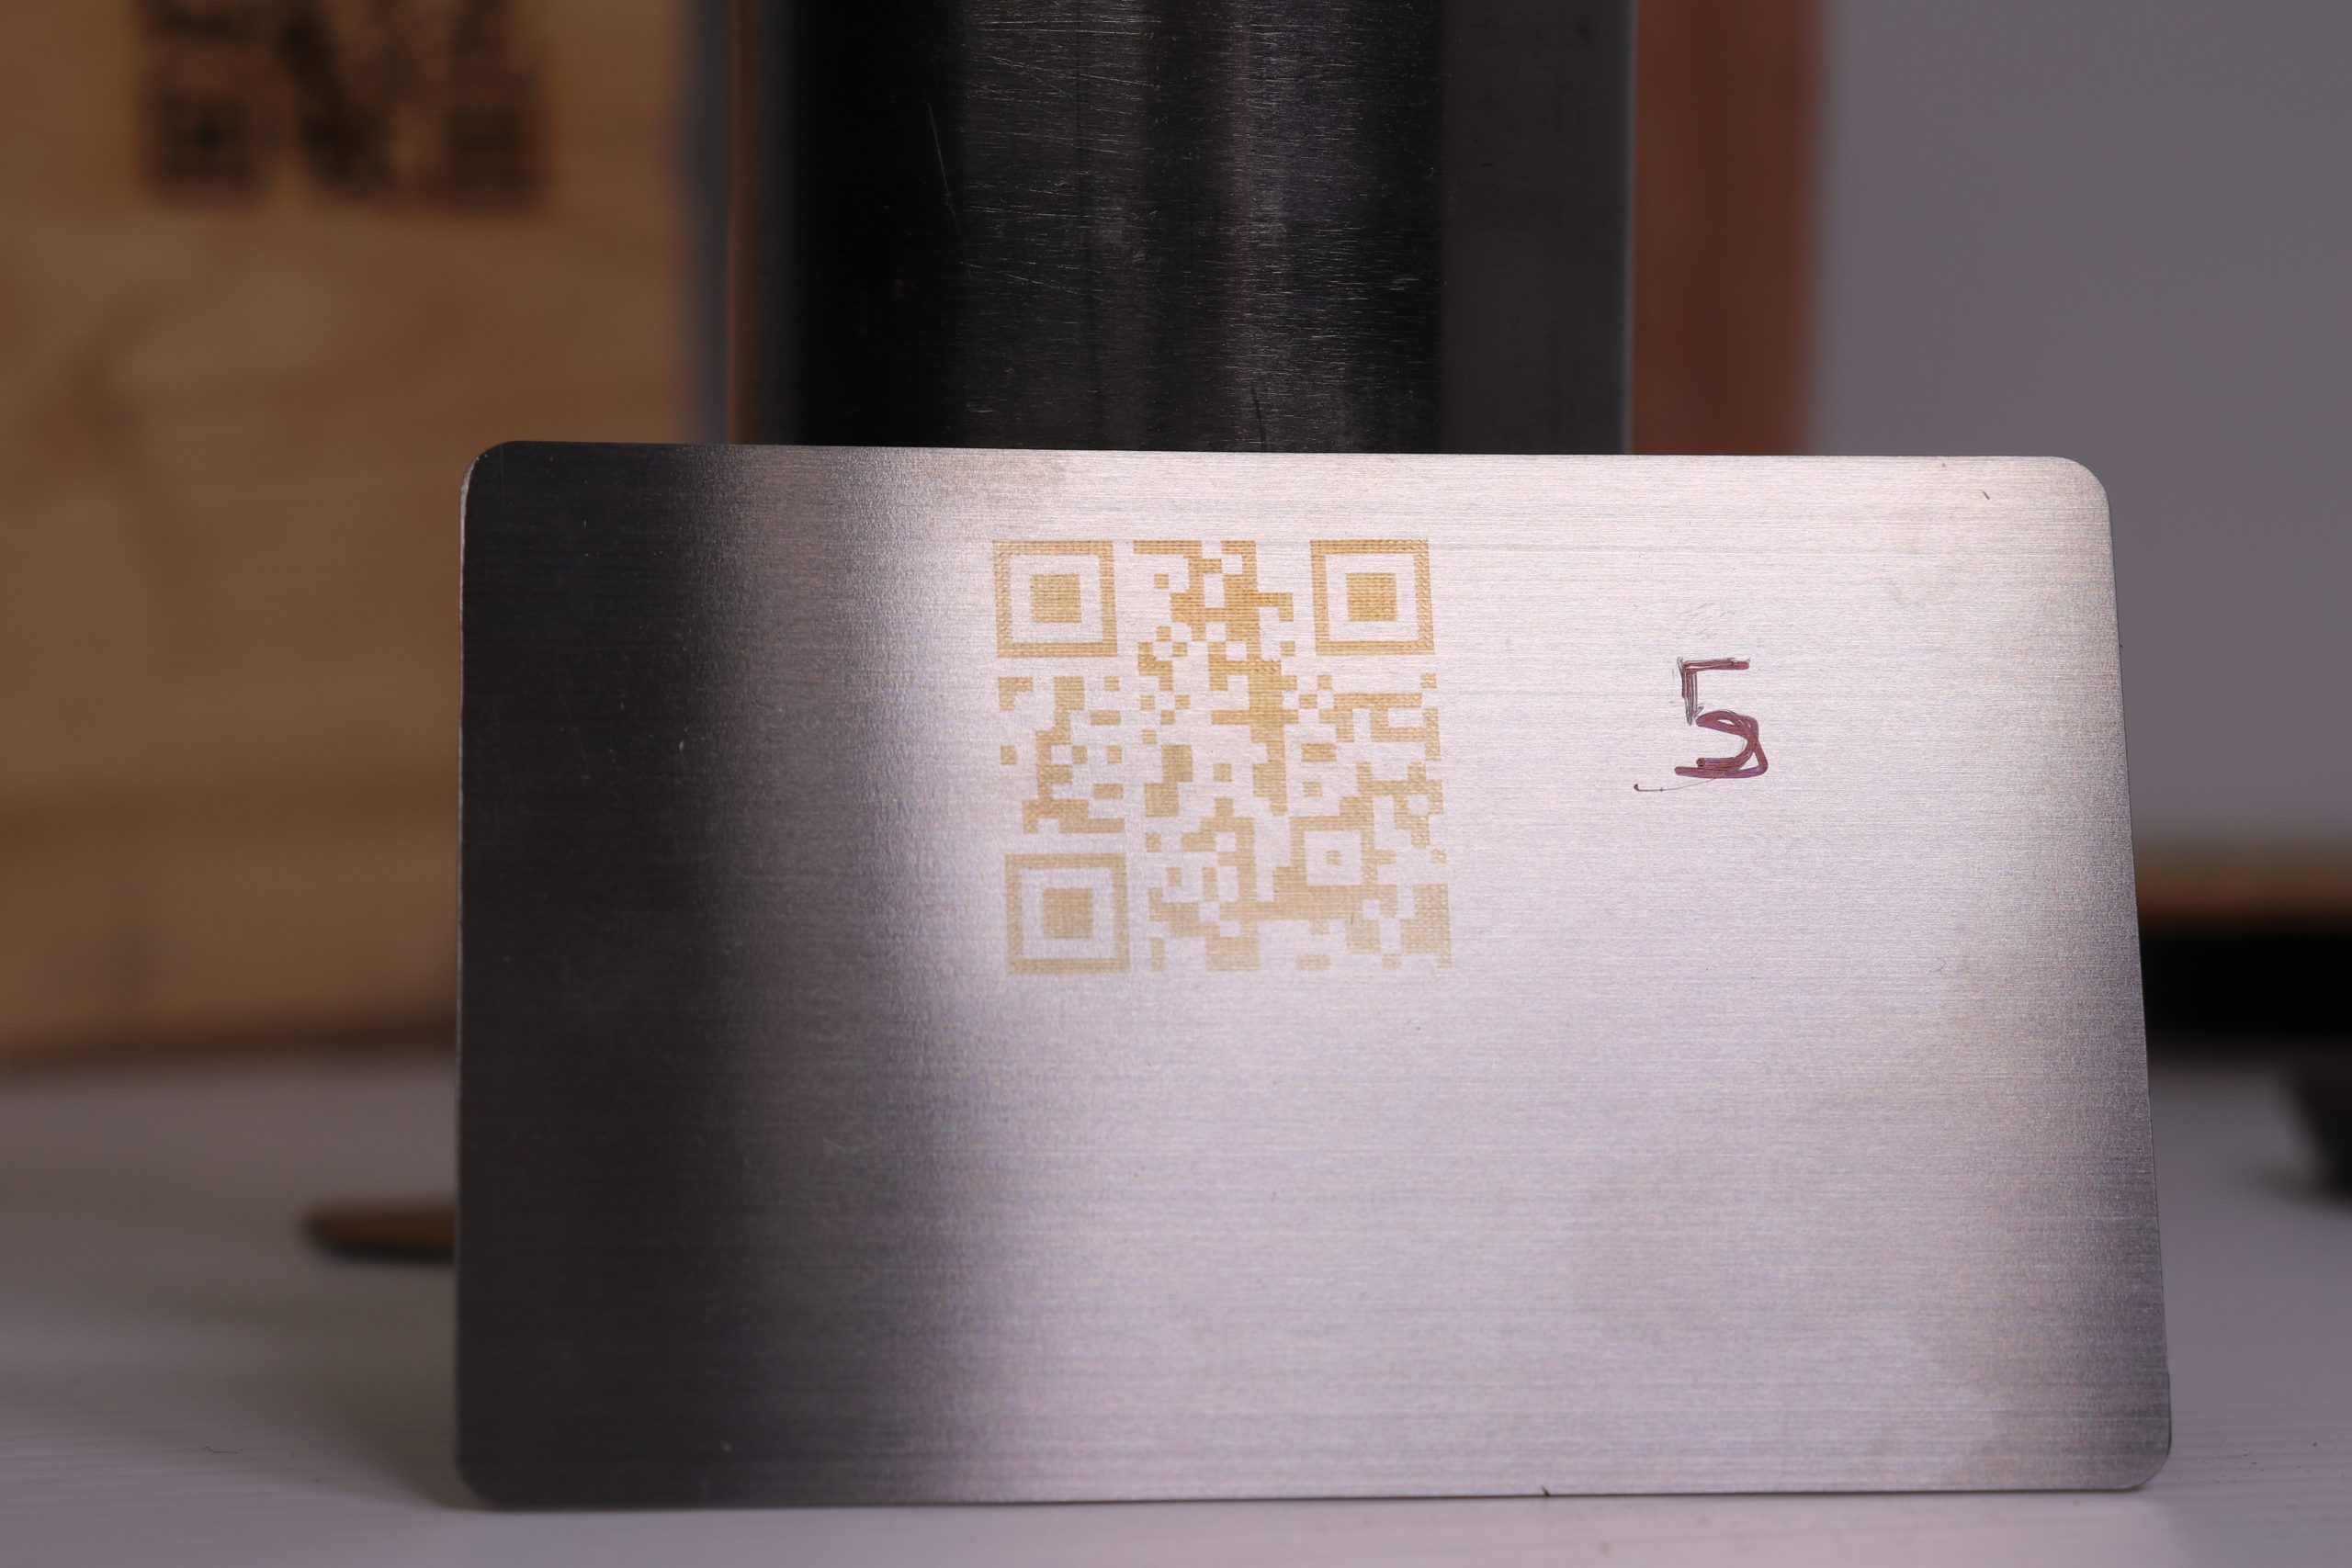
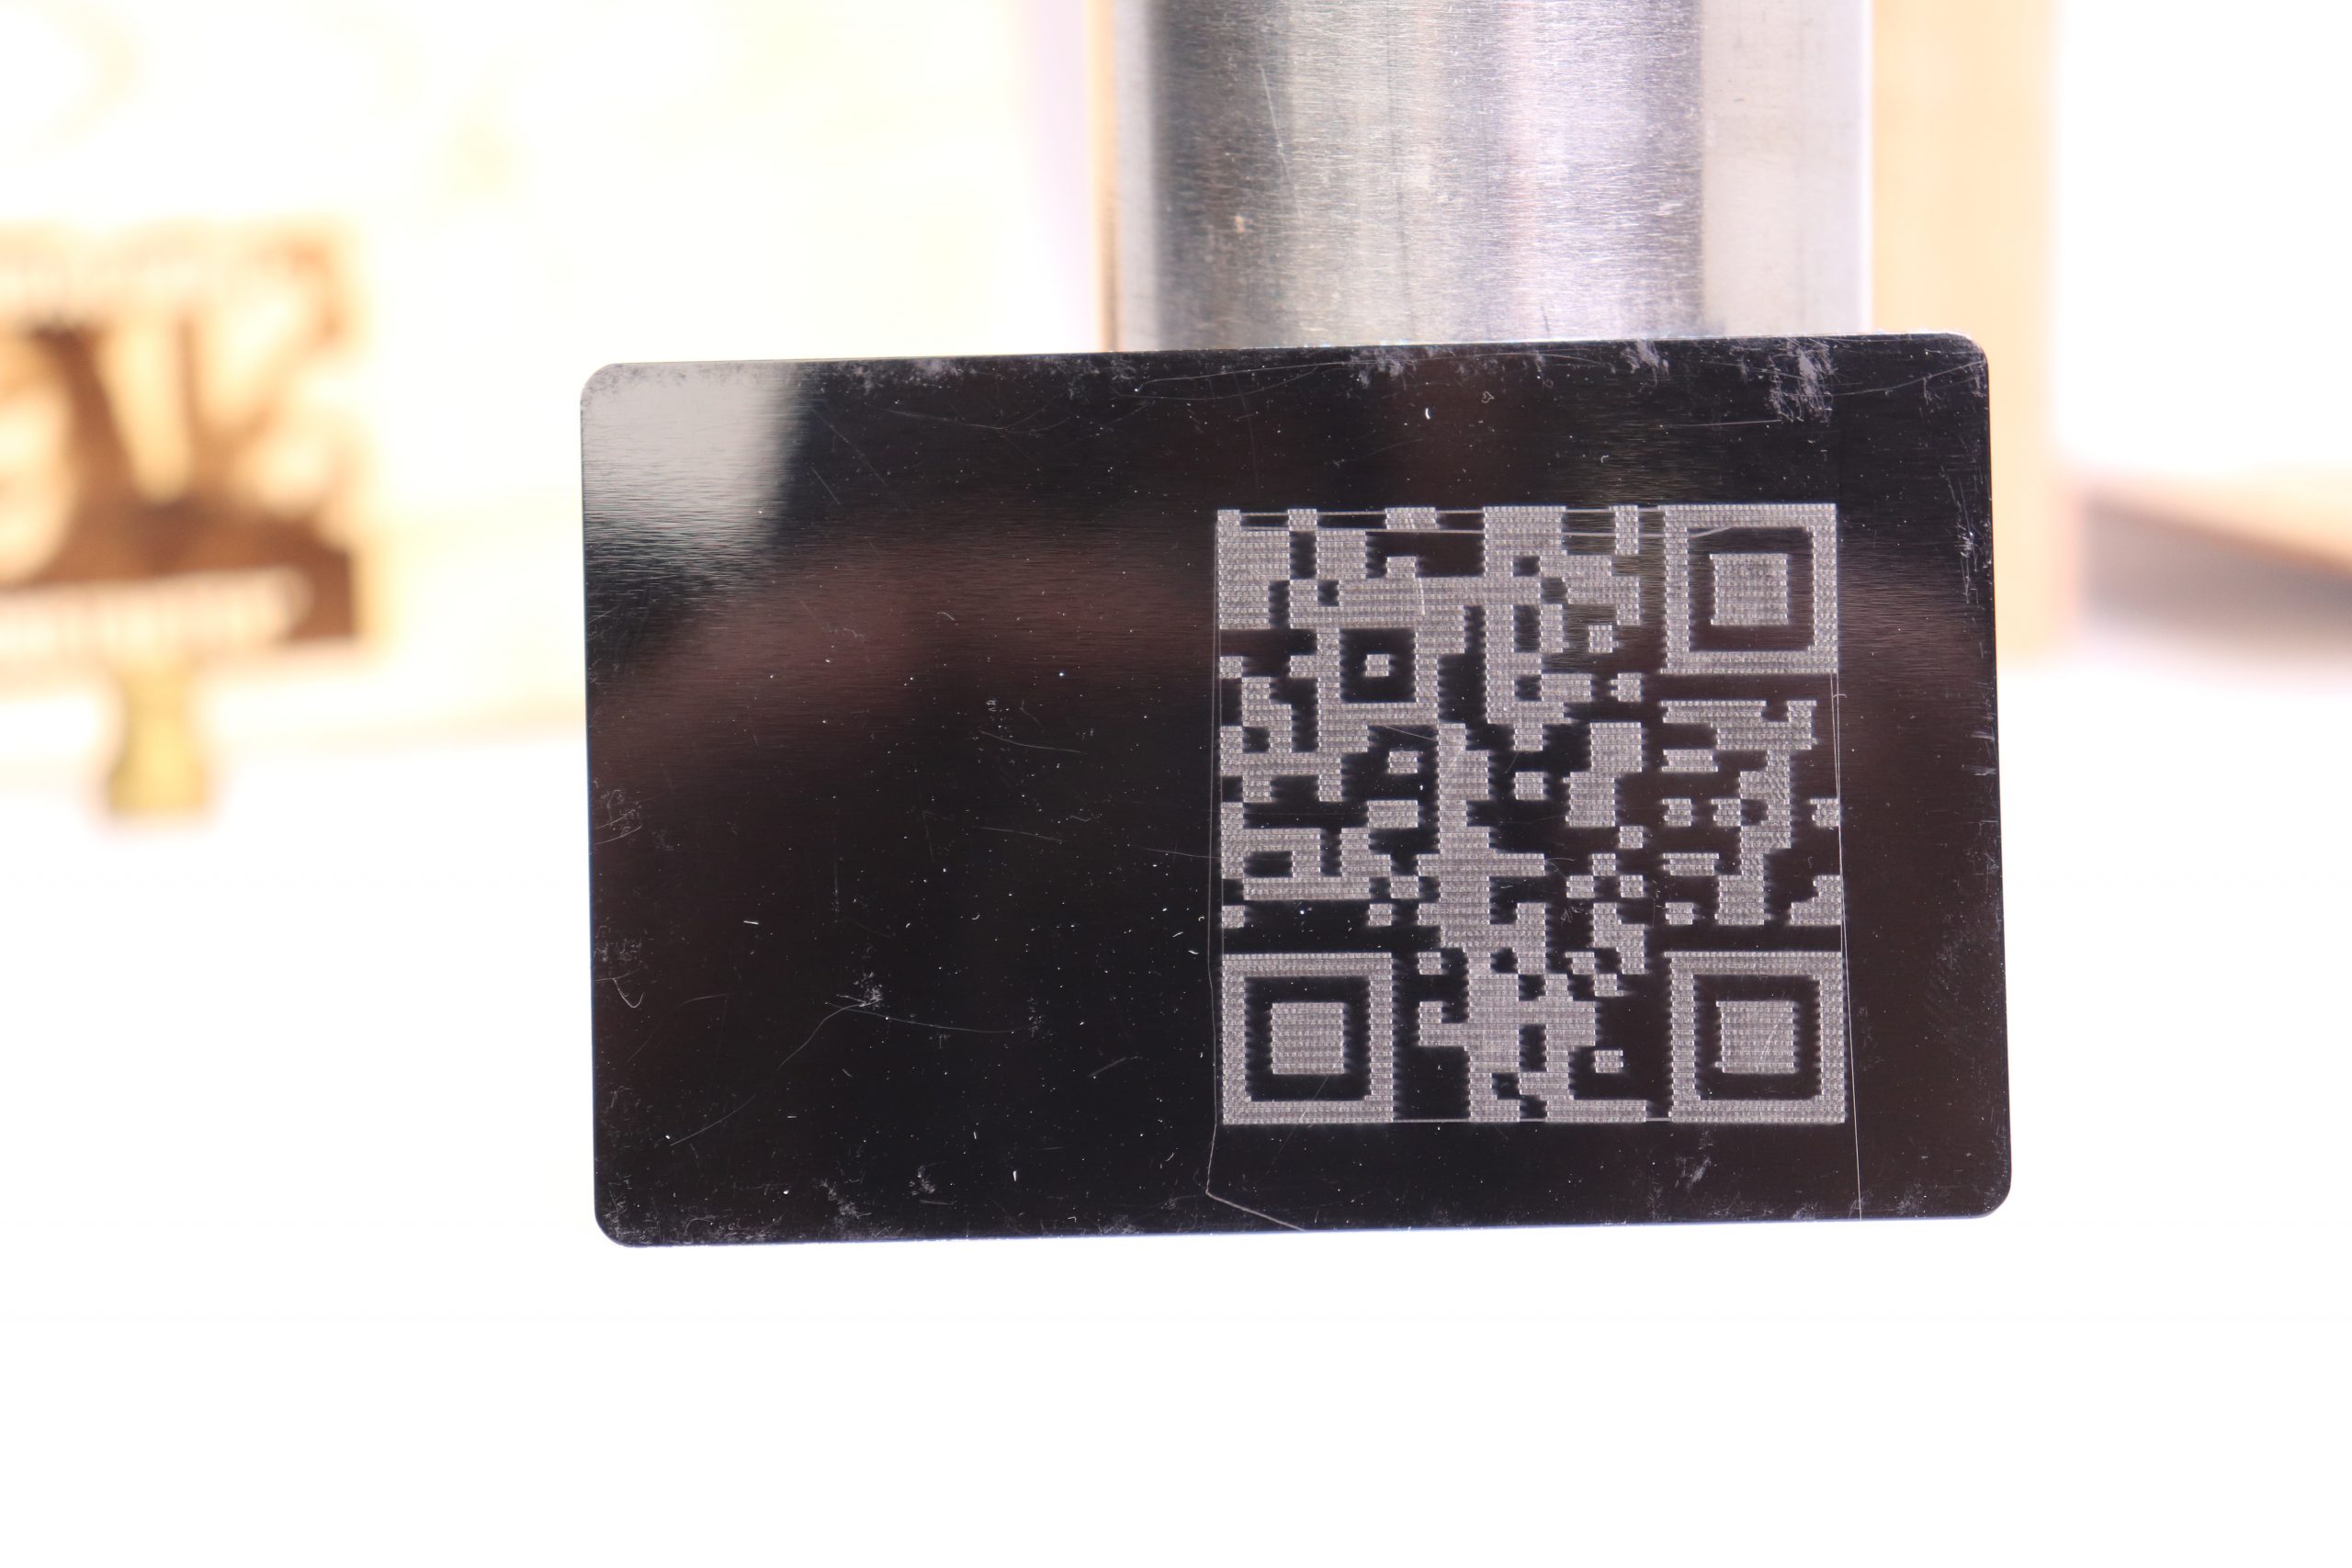
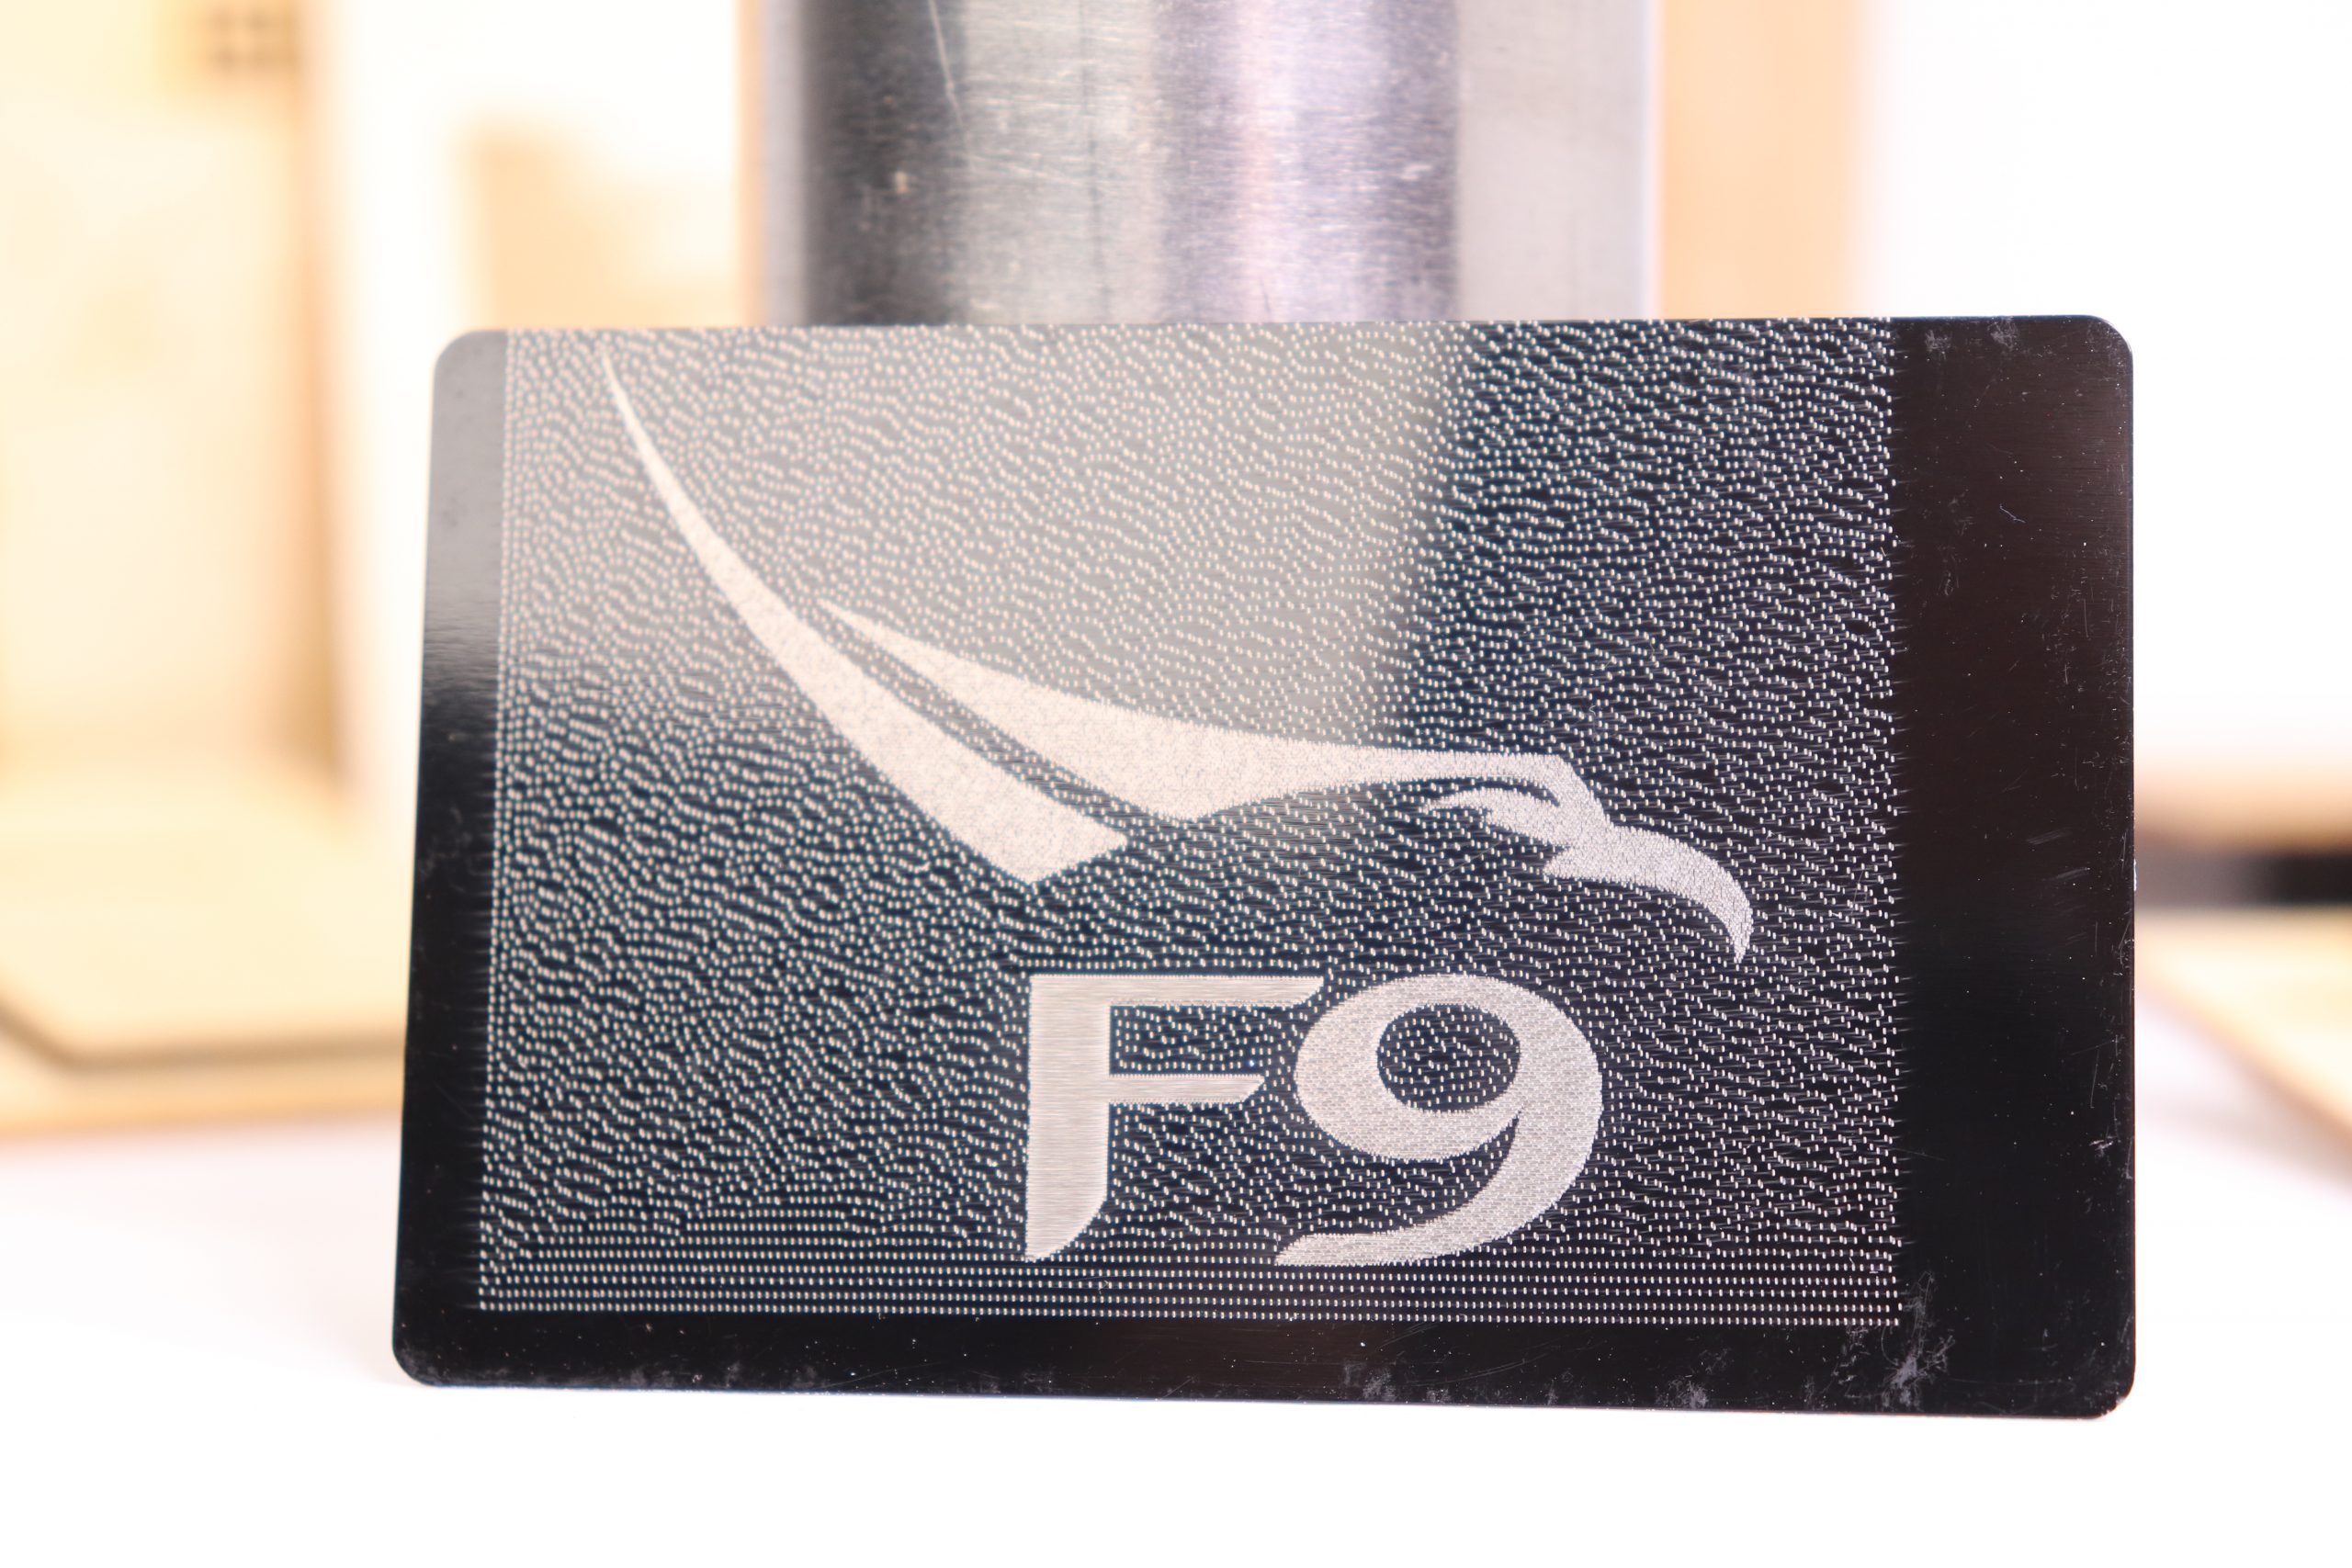
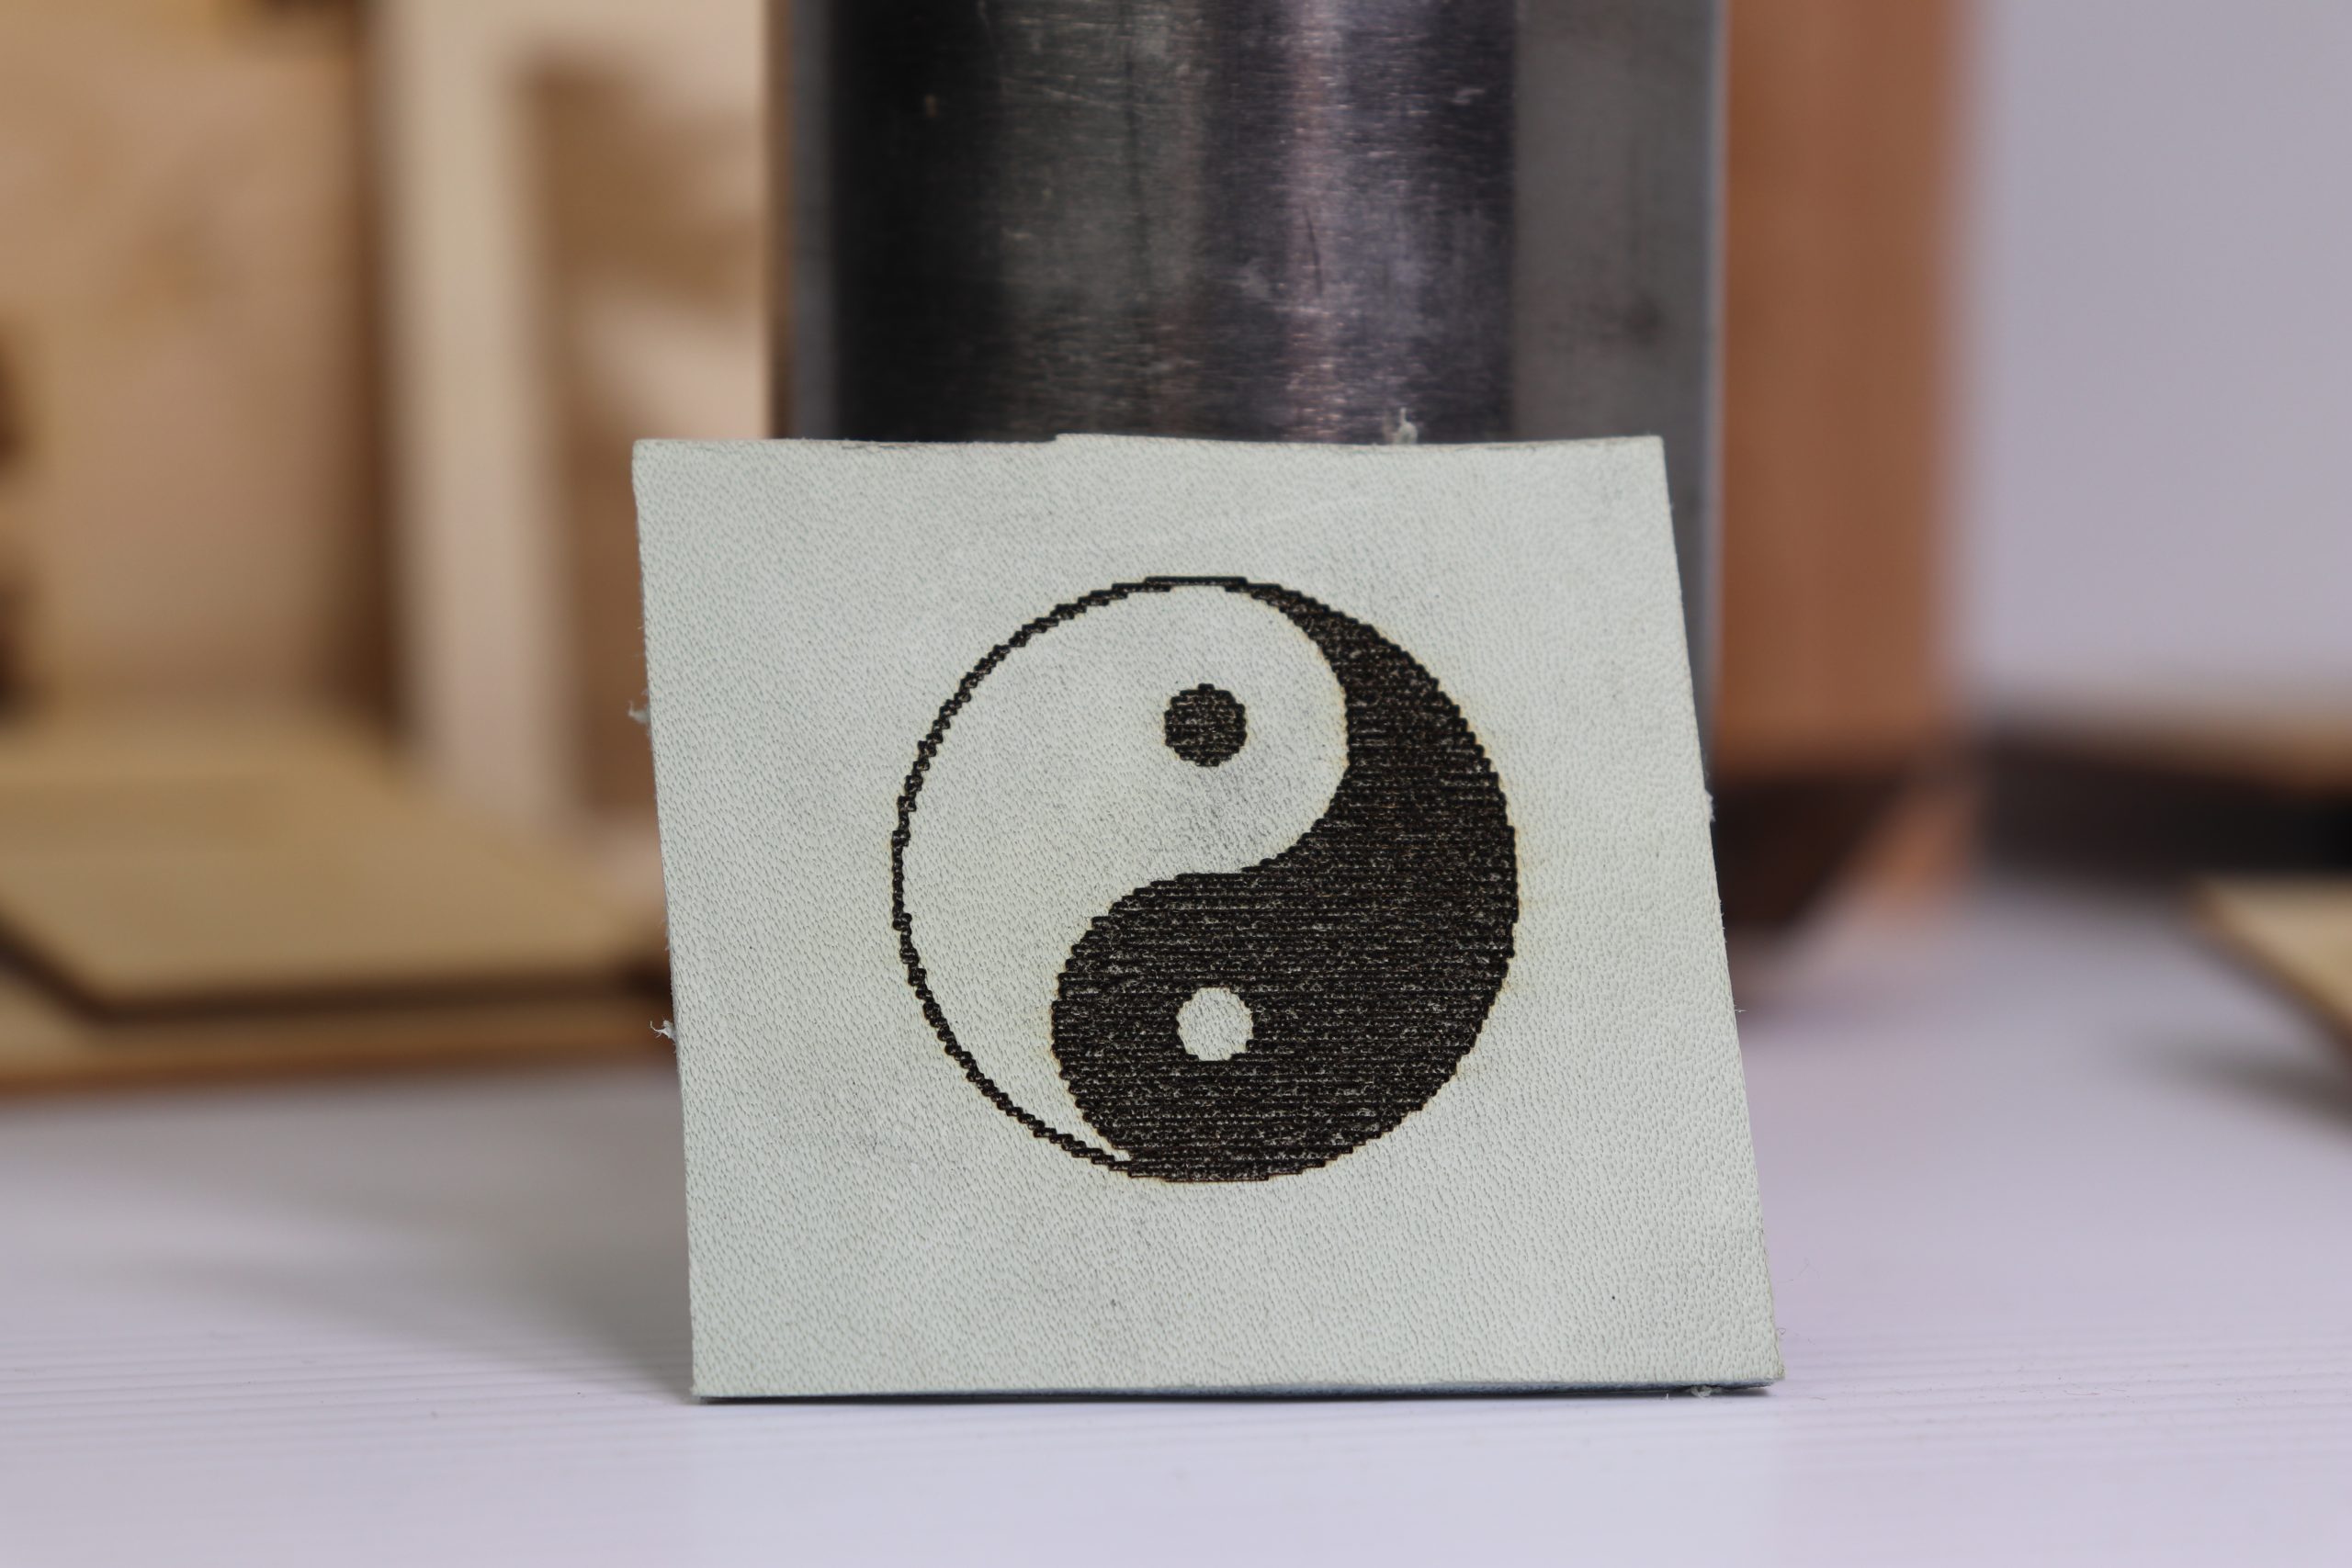
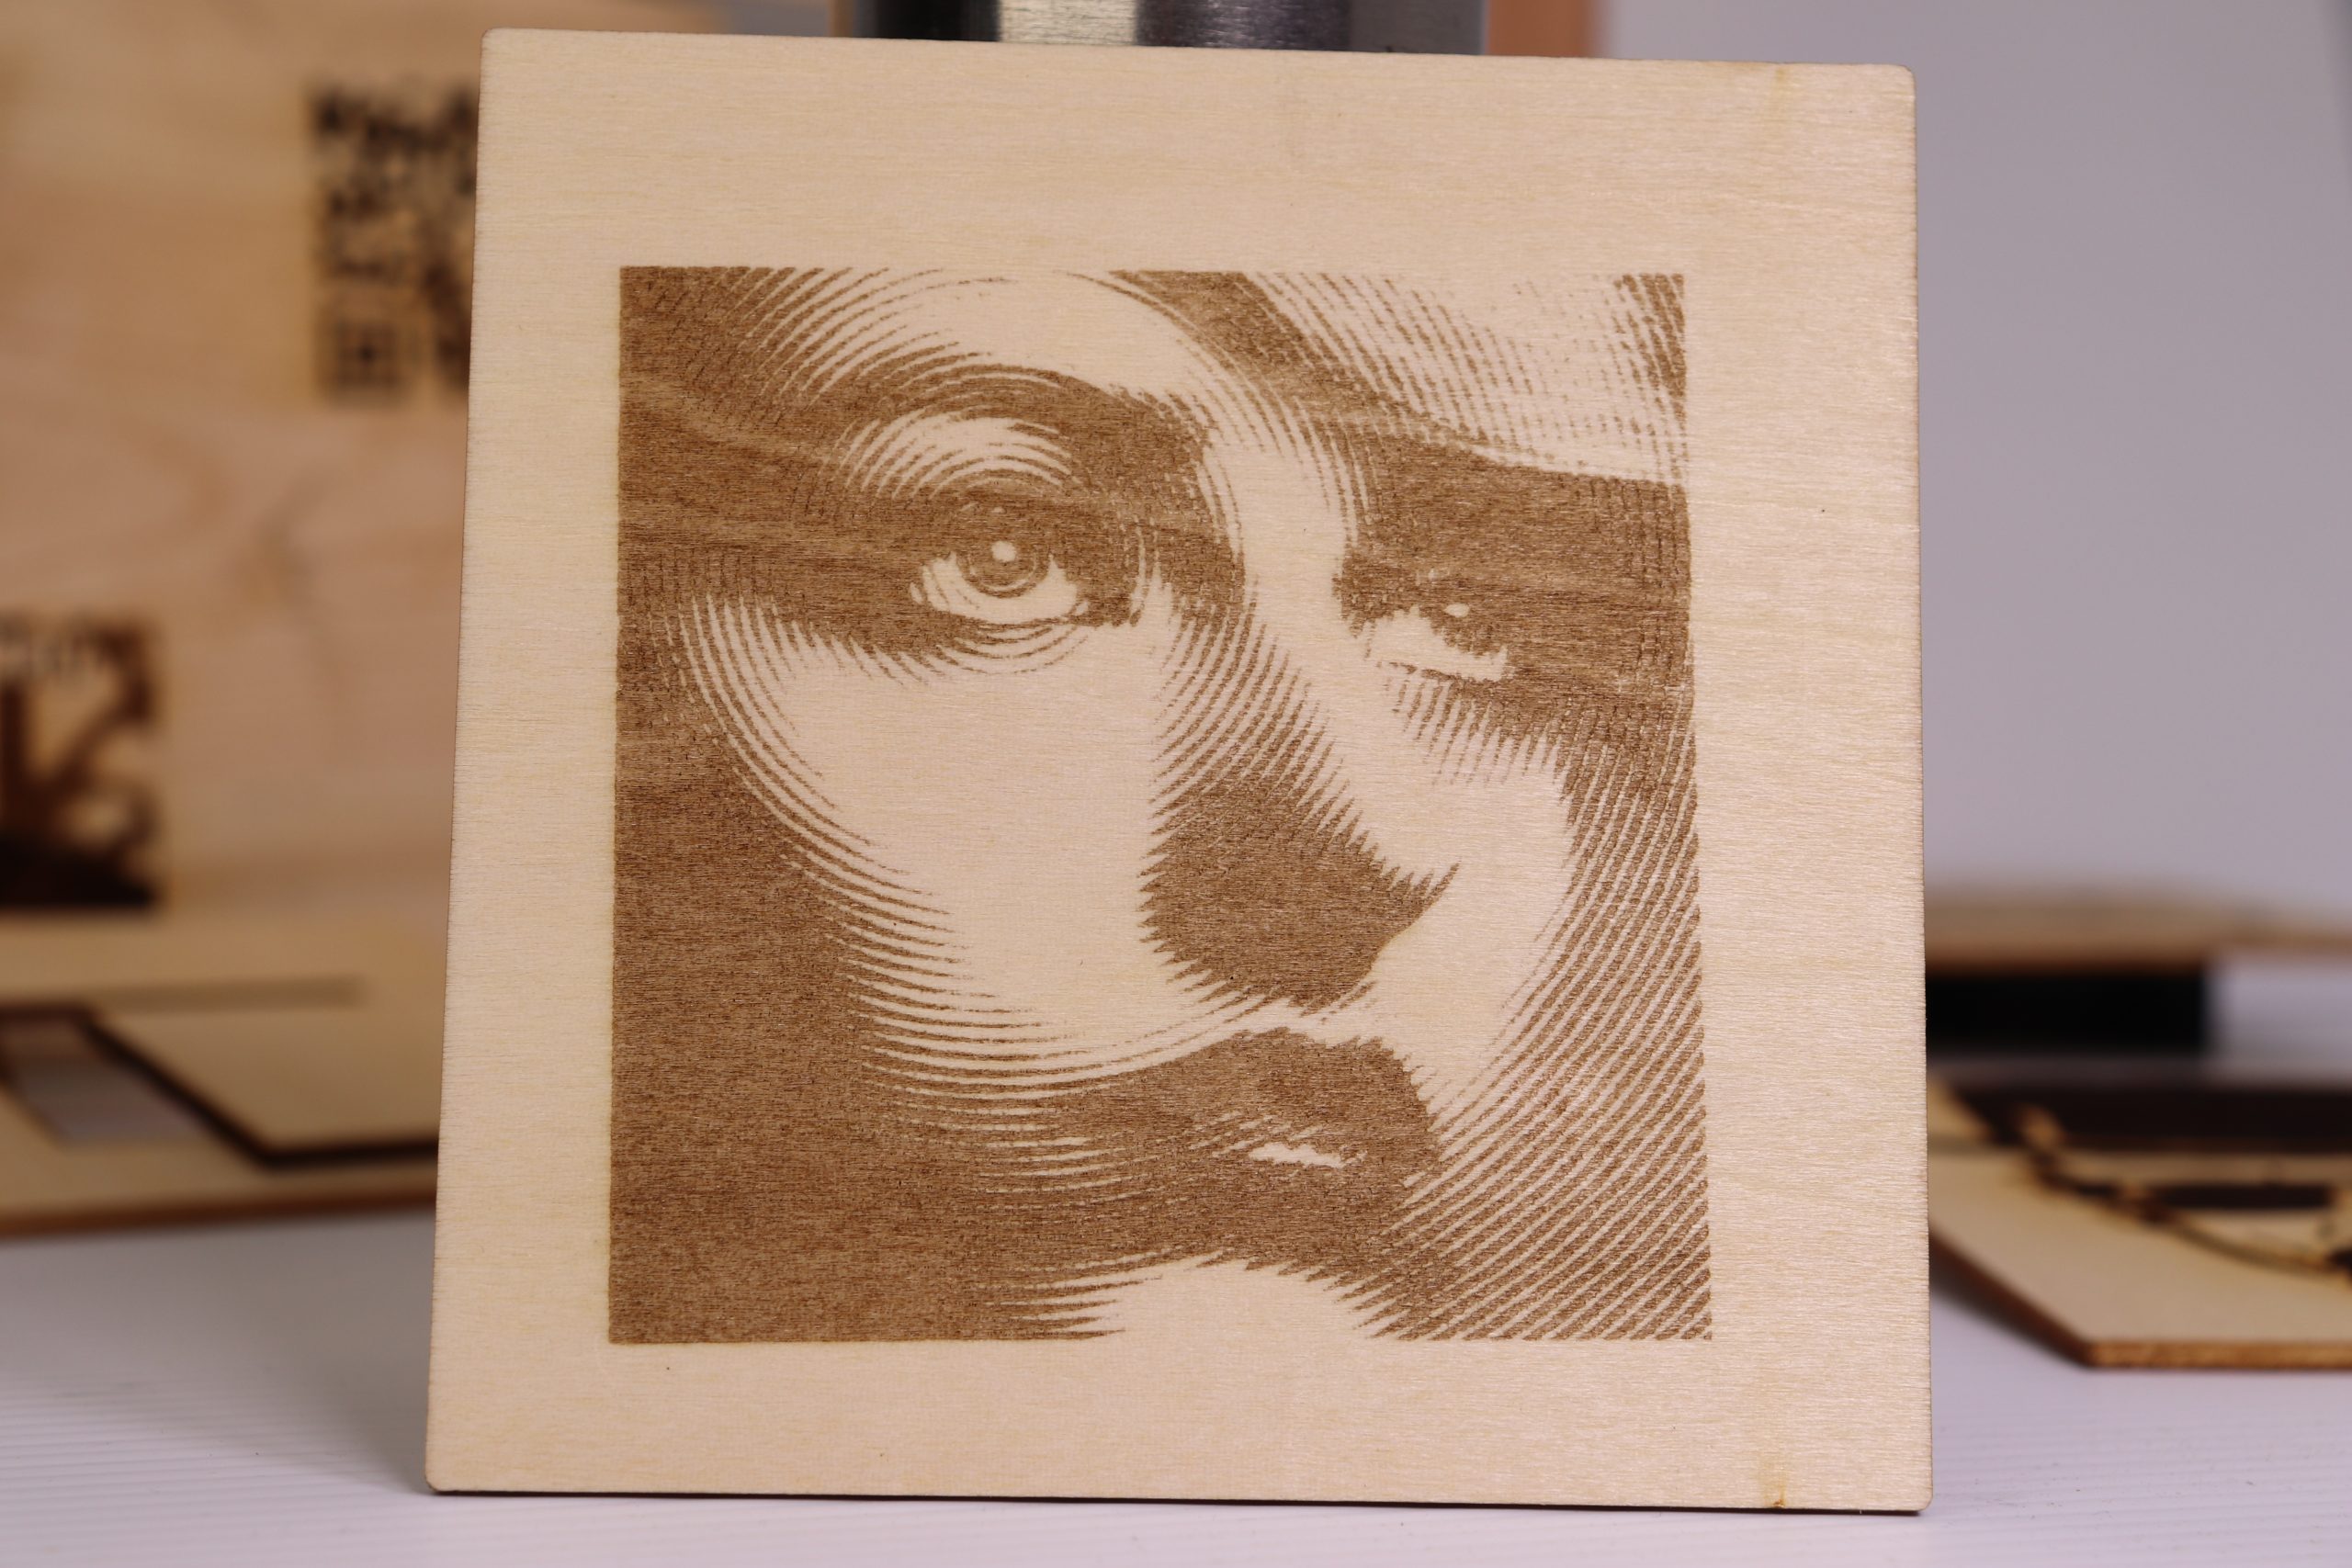
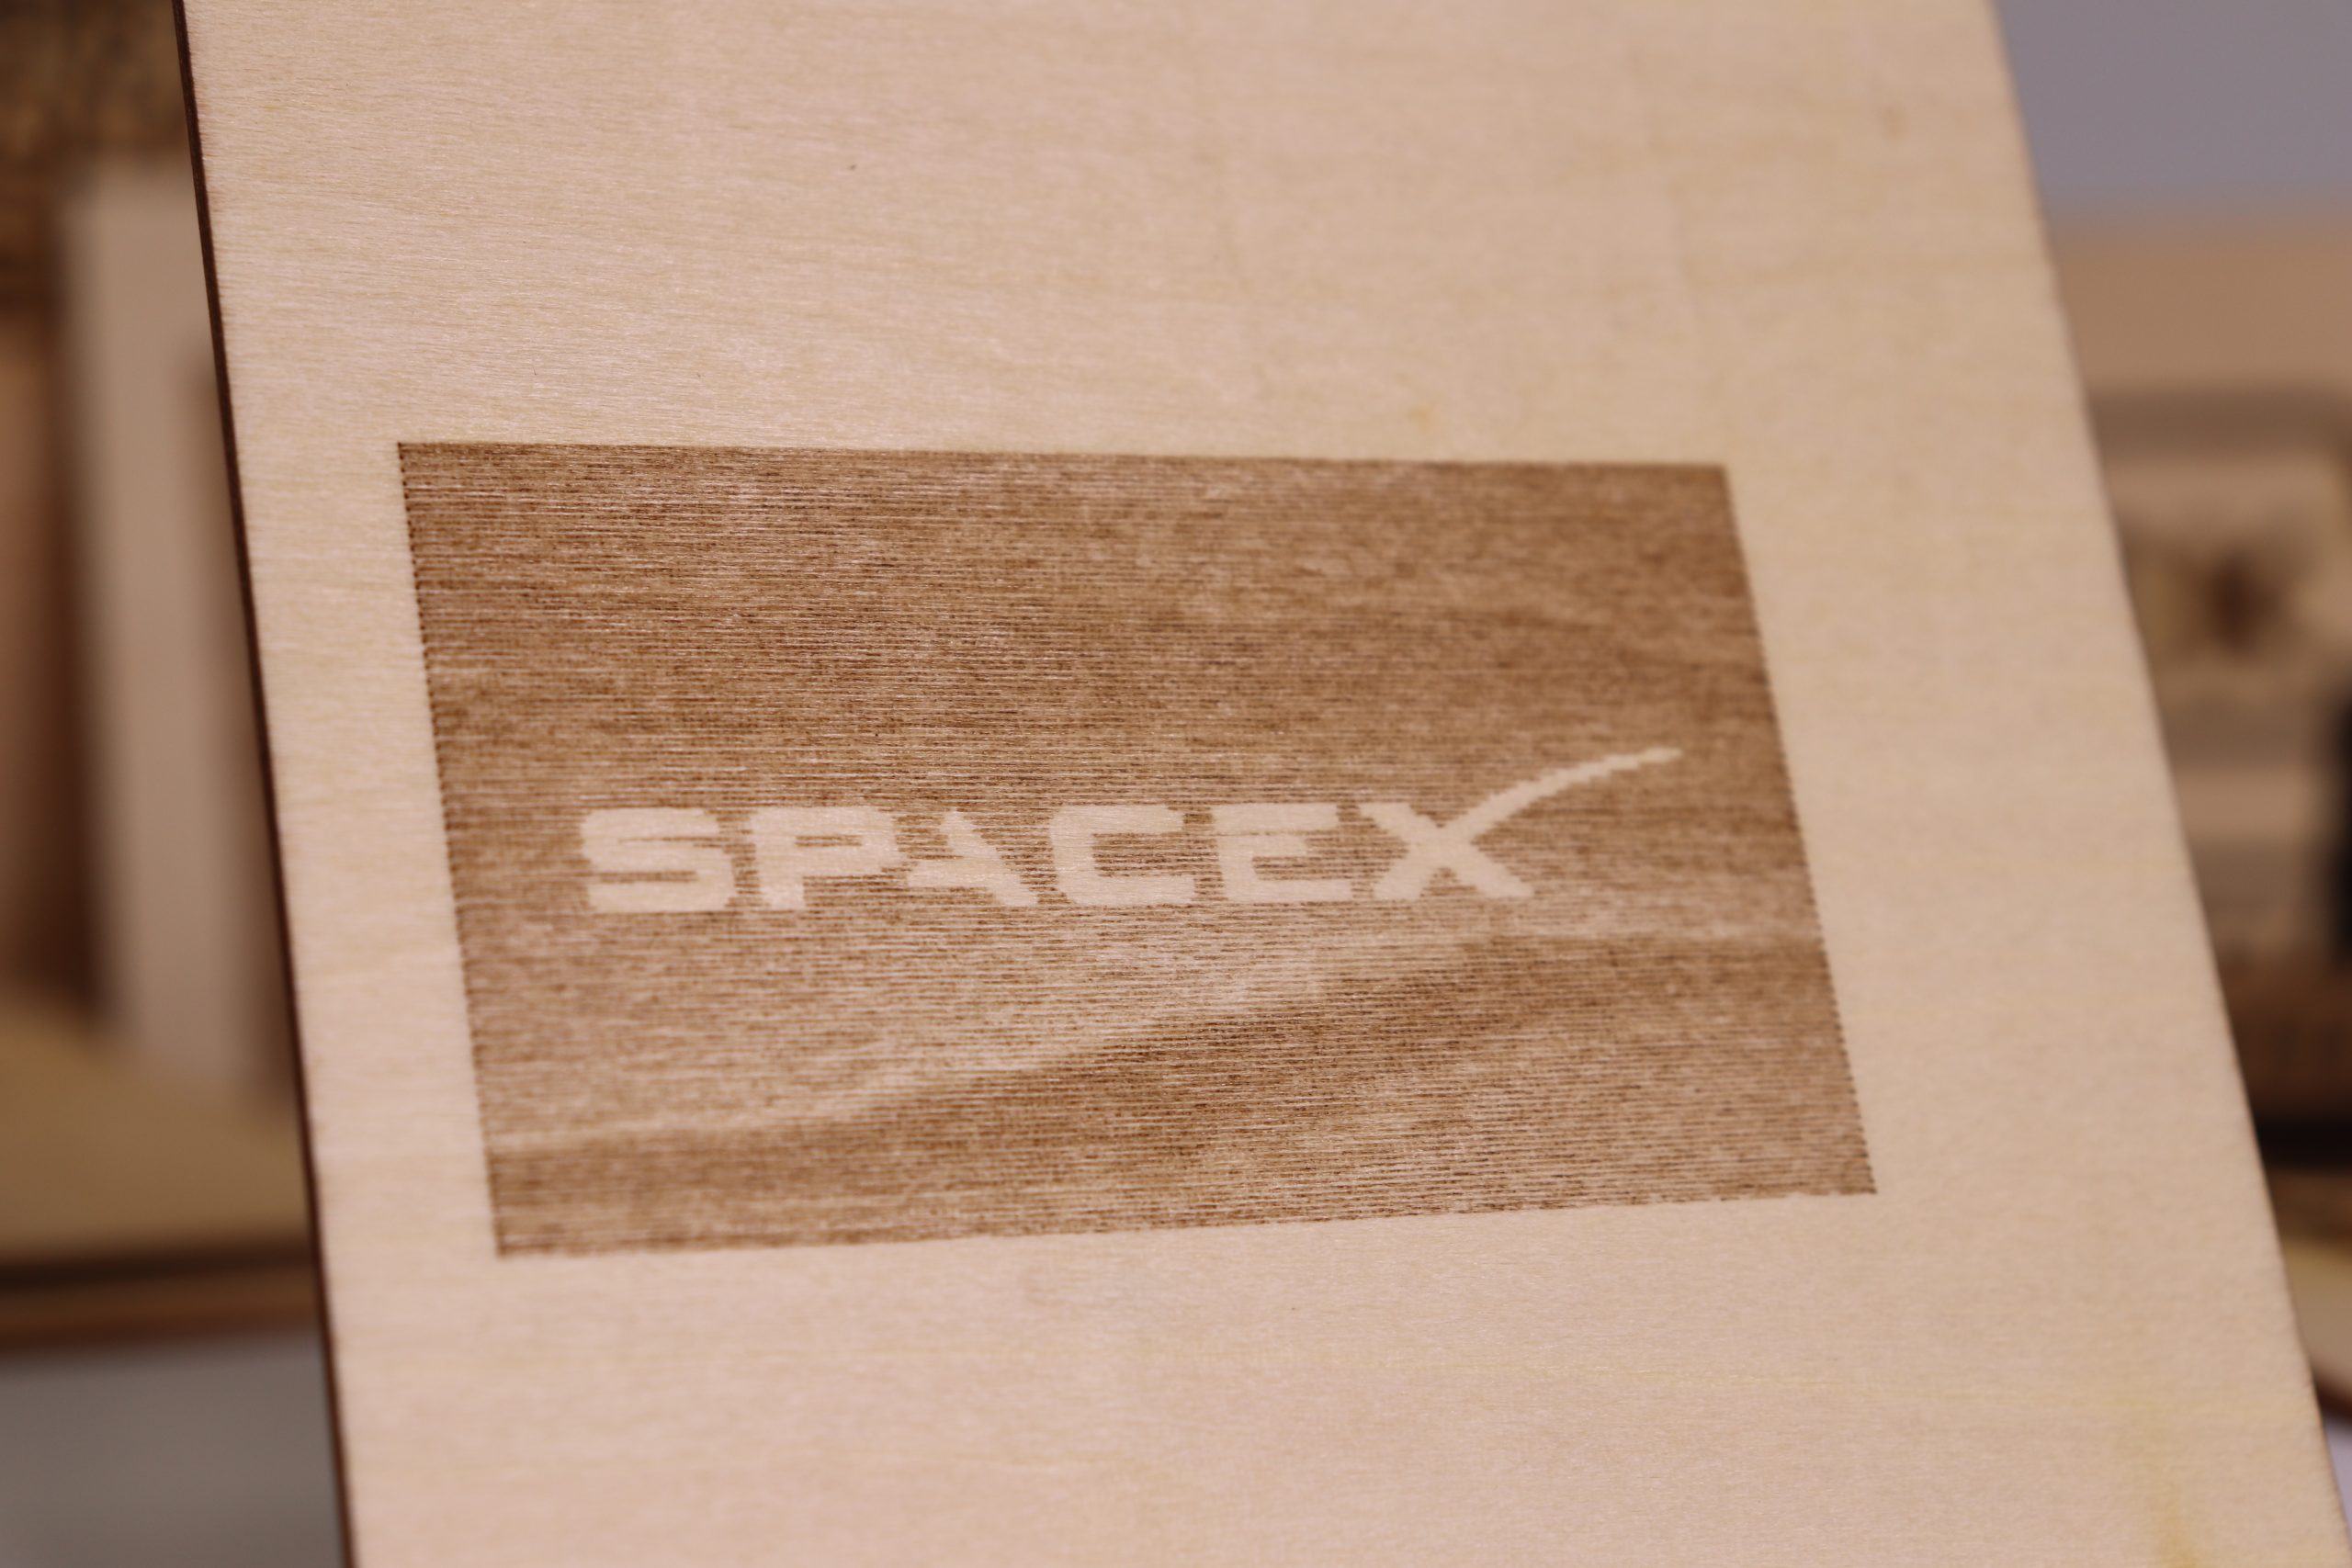
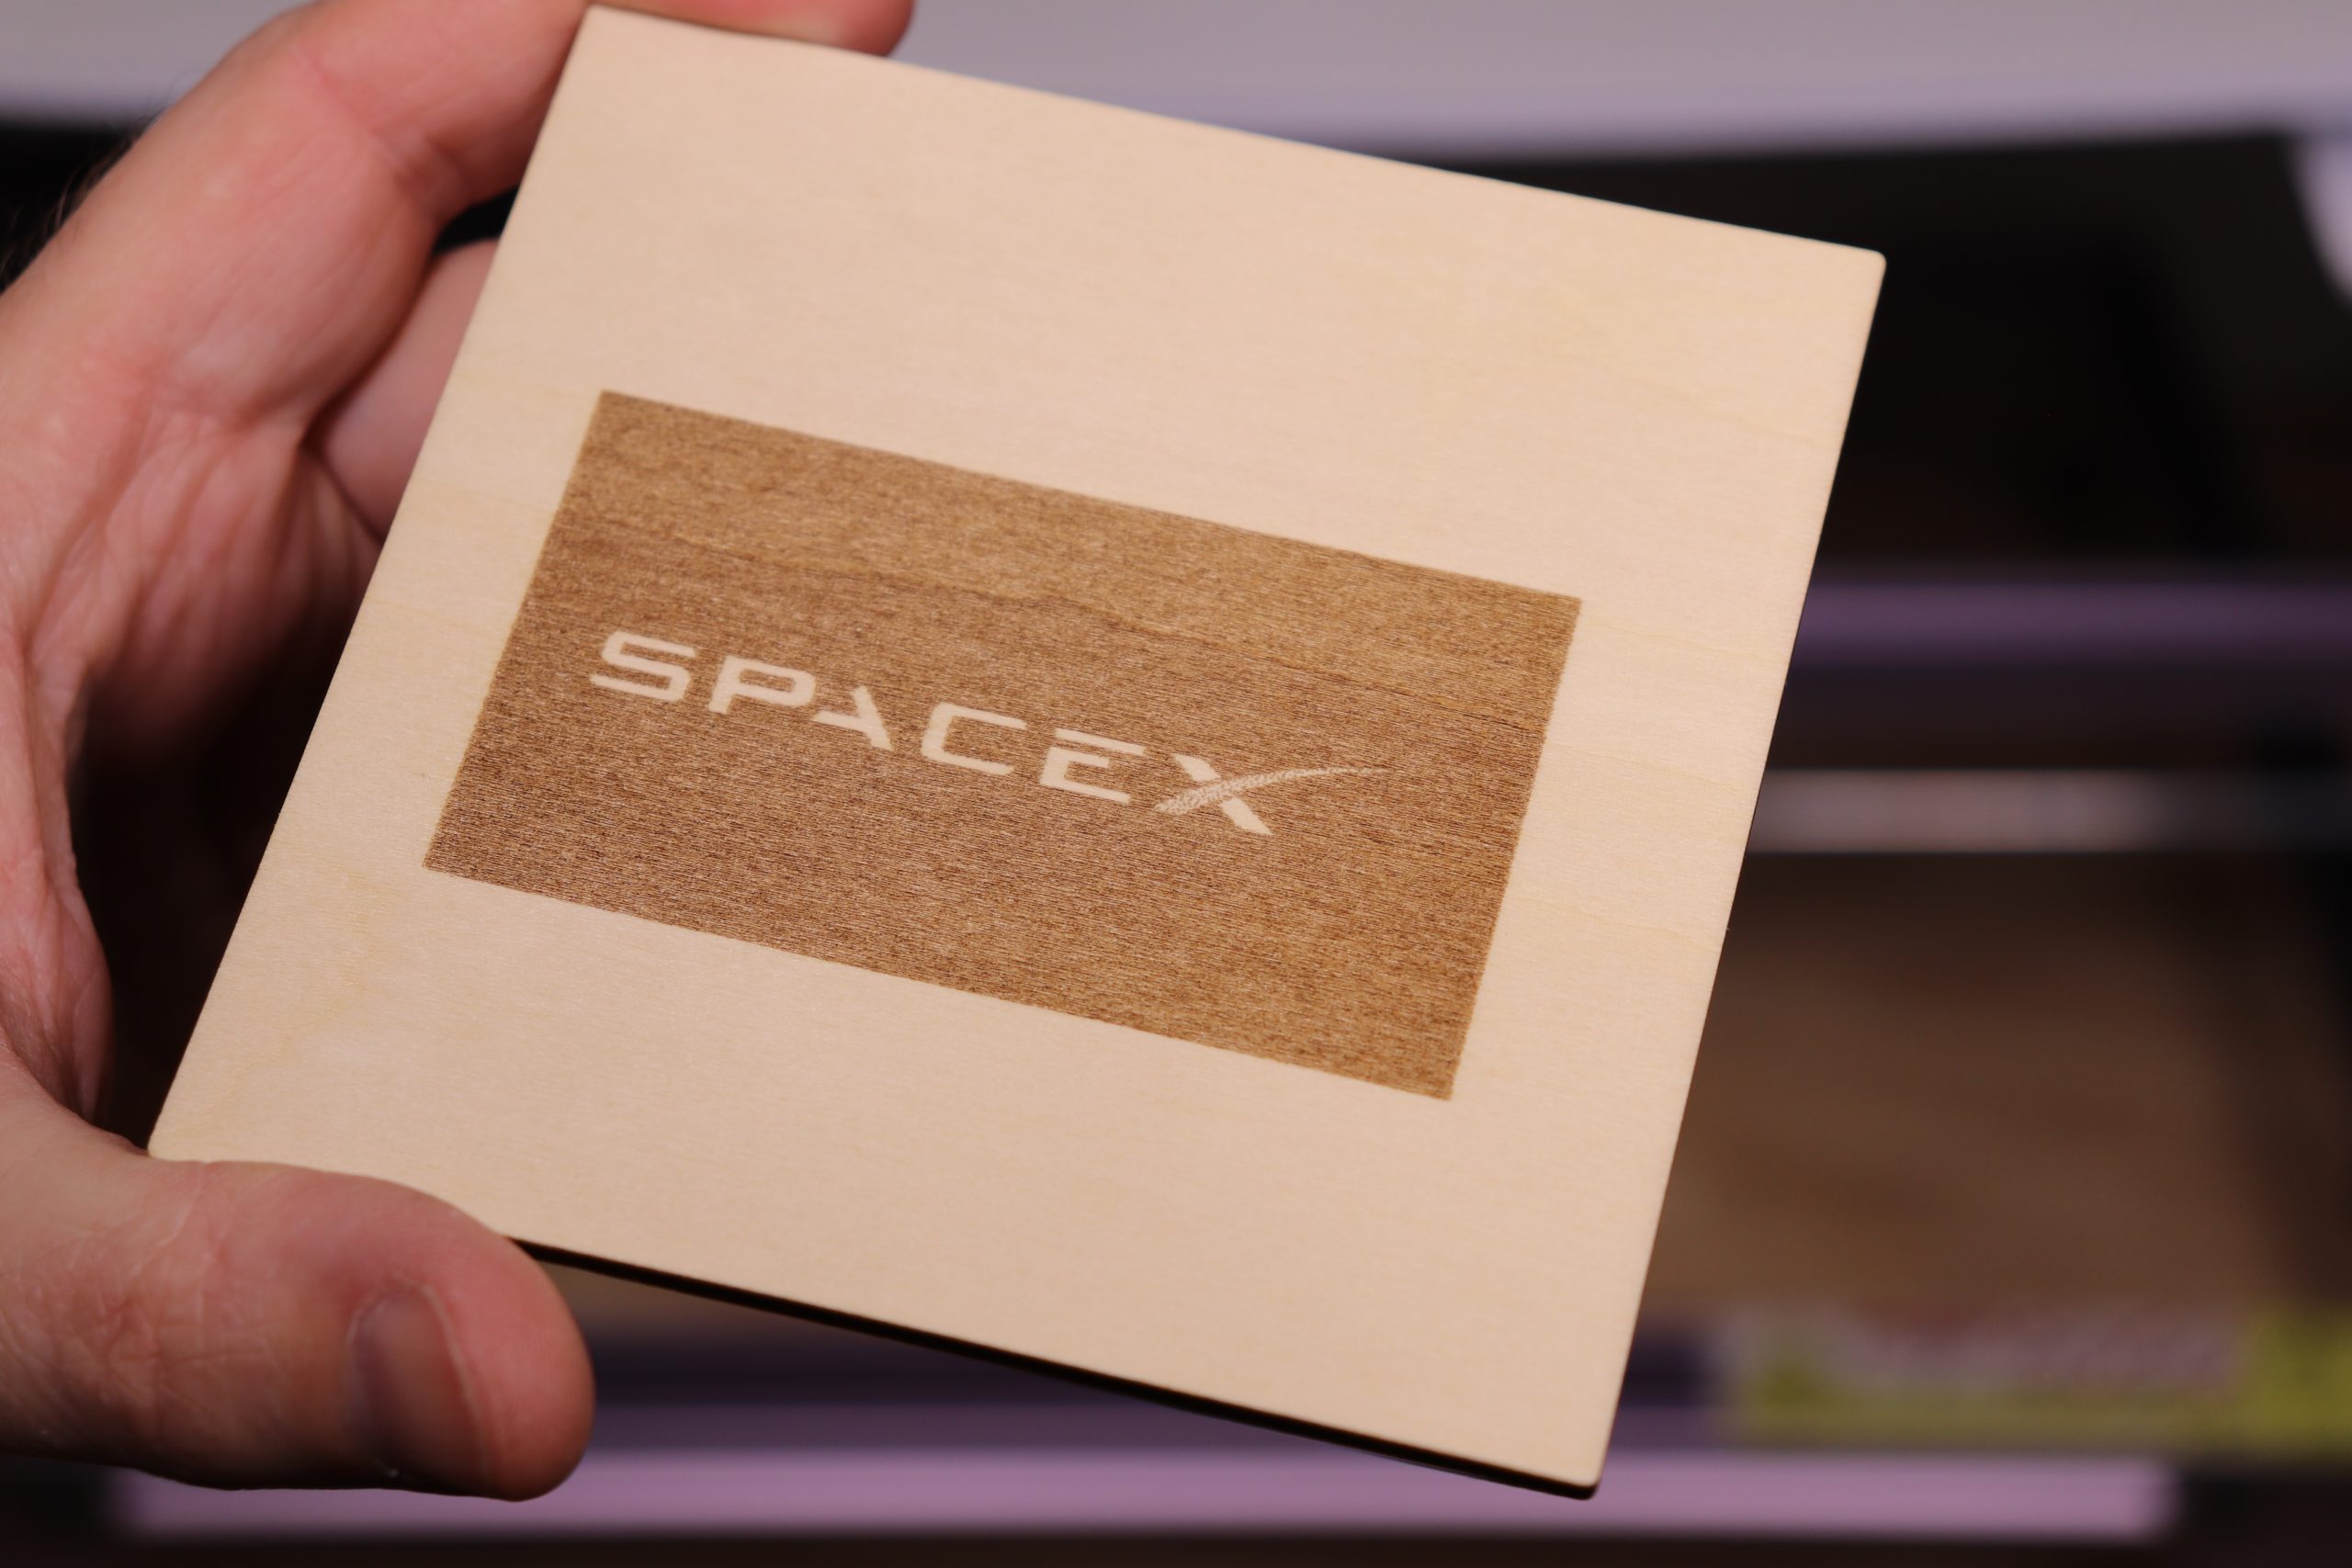
I found my first dive into “Frickin Laser Beams” (+10 if you get that reference) to be very pleasant. The machine does a good job and as far as I can tell, does what it’s advertised to do. I will temper that with the fact that good results come with some trial and error. This is nothing new coming from the CNC side of the fence. It just comes with the territory. The Atomstack A5 Pro is a welcomed addition to the Neo7CNC shop. Be sure to view the pictures below and watch the YouTube video if you haven’t already. As always links are below.
For those needing the user manual I used I’ve placed it here –> ATOMSTACK A5 Manual
Atomstack A5 Pro Laser Engraver (check each for best price)
Banggood (use code BGAtomprous for $100 off!) https://bit.ly/3oow0ik
Alliexpress (use coupon:LAT72CPROF7 for 20$ off!) https://bit.ly/3yiAE5I
Amazon https://amzn.to/3ygtOOo
Software Links:
LaserGRBL Software (free) https://lasergrbl.com/download/
LightBurn Software (free trial/$40 to buy) https://lightburnsoftware.com
Addition items used in the video:
Wood squares – https://amzn.to/33RUNBW
Kraft paper tags – https://amzn.to/3foiLK9
Painted aluminum business card sized blanks – https://amzn.to/3yj6q2E
Stainless steel business card sized blanks – https://amzn.to/3bAn0RL
6″ inline blower – https://amzn.to/3ftxCmu
6″ duct kit – https://amzn.to/3eWjVh0
6″ flange – https://amzn.to/33UlbuG
6″ blast gate – https://amzn.to/3hyPNKs
Atomstack website http://atomstack3d.com/atomstacka5pro
Support the channel: – PayPal https://www.paypal.me/neo7cnc


